Create a new Hydrostatic Test in FieldLab Desktop
Create a custom hydrostatic test in FieldLab Desktop to run on a FieldLab.
Overview
This article will show you how to create a Hydrostatic Test in FieldLab Desktop.
Once you create it, you can use a FieldLab and one or more Field Gauges/Process Meters to perform a Hydrostatic Test.
- The FieldLab will read pressure.
- The Field Gauge(s)/Process Meter(s) will read temperature(s).
- The Field Gauge(s)/Process Meter(s) will transmit the temperature readings wirelessly to the FieldLab.
- The FieldLab will save all temperature and pressure readings to one data set, which can be downloaded to a PC.
Things you will need to create the test.
- A PC running Windows.
- FieldLab Desktop software version 1.32 or later installed on your PC. Download the latest version for free.
Things you will need to perform the test.
- FieldLab with wireless module running firmware 1.127 or later.
- Provided USB cord for syncing the test to your FieldLab.
- Field Gauge LC20 or Process Meter LC30 with wireless radio and temperature sensor.
In FieldLab Desktop, select Test Modes.
Select New > Hydrostatic
On the Test Modes screen, select the New button, and then select Hydrostatic from the drop down menu.

Name the test
The name you enter will help you identify the test in your list of test modes in FieldLab Desktop and on the FieldLab once you sync the test.

Set the desired logging interval
Example: Record pressure and temperature once every second, once a minute, once an hour, etc.

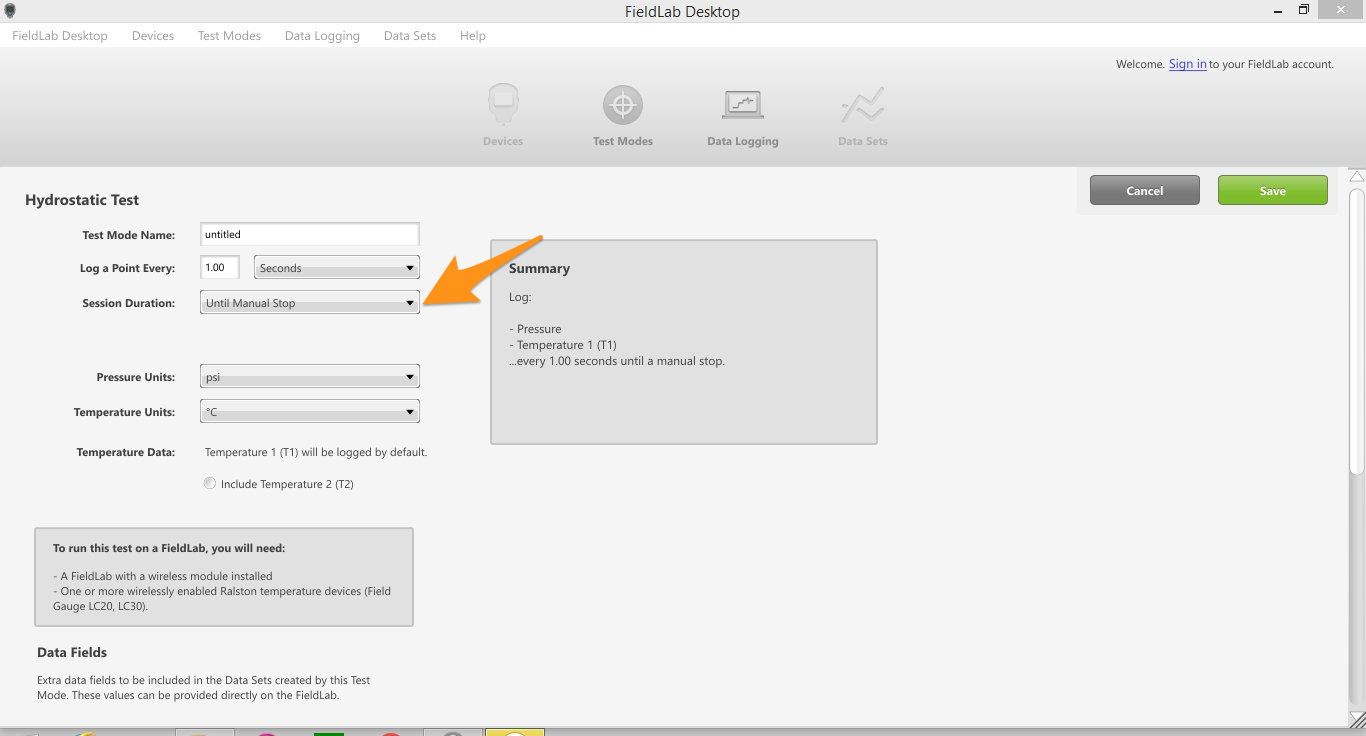
Set the session duration
You can choose to manually stop the test yourself (Until Manual Stop), or set the test to automatically stop recording data after a certain amount of time, or after a specified number of points are logged.

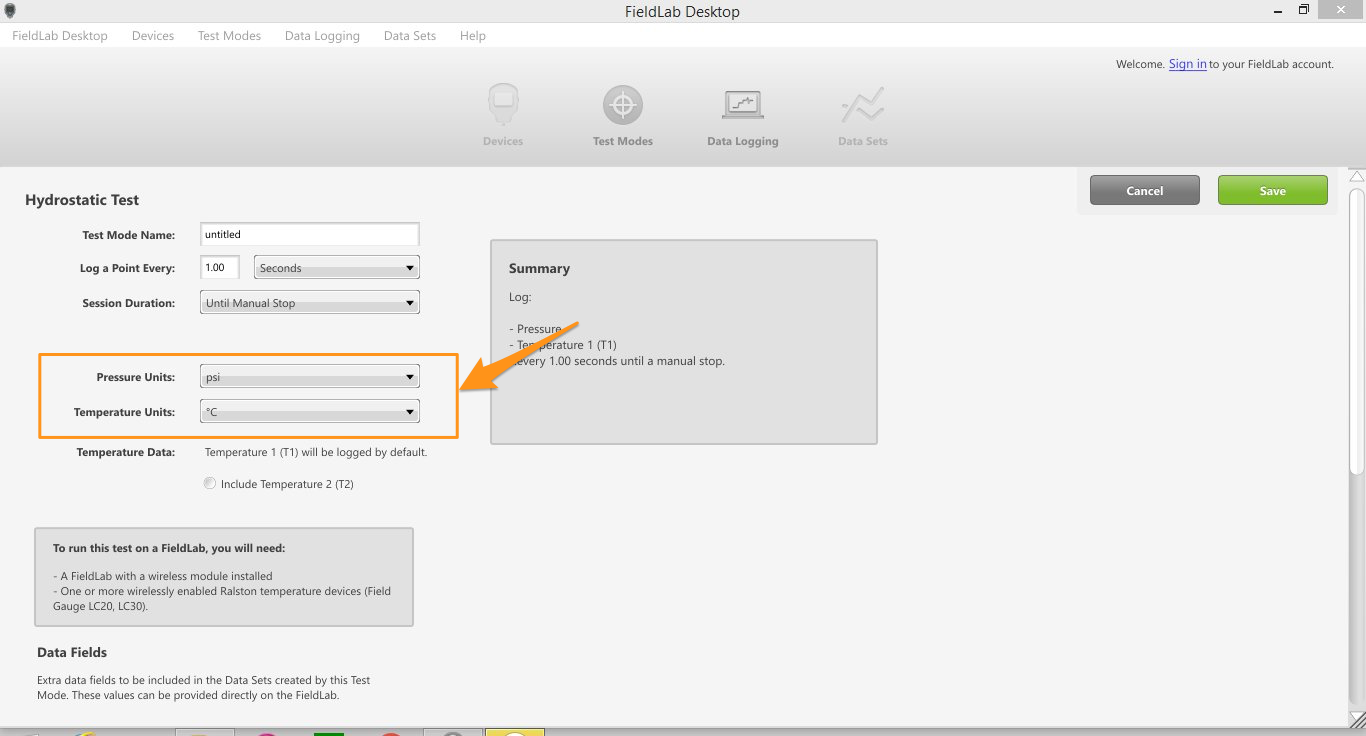
Specify the pressure and temperature units you want the test to use.

Specify the number of temperatures inputs (one or two).
These settings will tell the FieldLab how many temperature inputs to include in the test. One temperature input is included by default, but you can add a second one if desired.
Field Gauges/Process Meters with temperature sensor and wireless radio will read temperature(s) and transmit the data to the FieldLab, where it will be saved, along with pressure data read by the FieldLab.

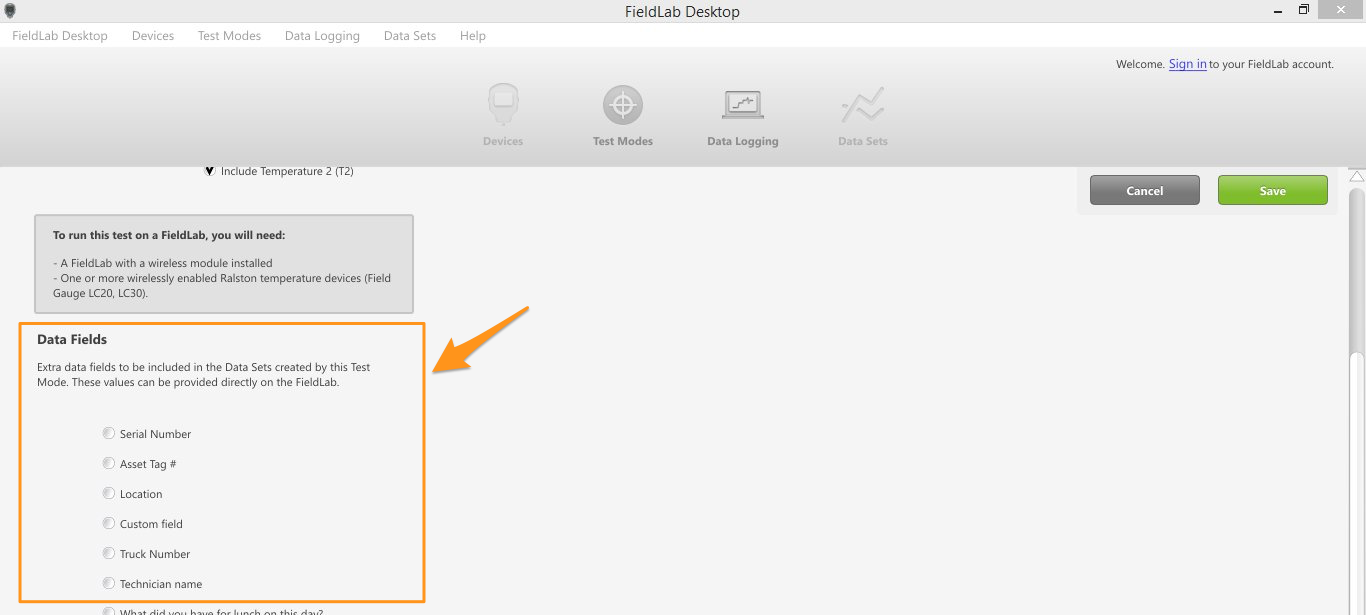
Optional: Select custom data fields to include in the saved test data.
You can create custom data fields to include with your tests. In FieldLab Desktop to to: Preferences > Test Modes > Custom Data Fields.
Step-by-step instructions here: Learn how to include custom data fields in your tests.

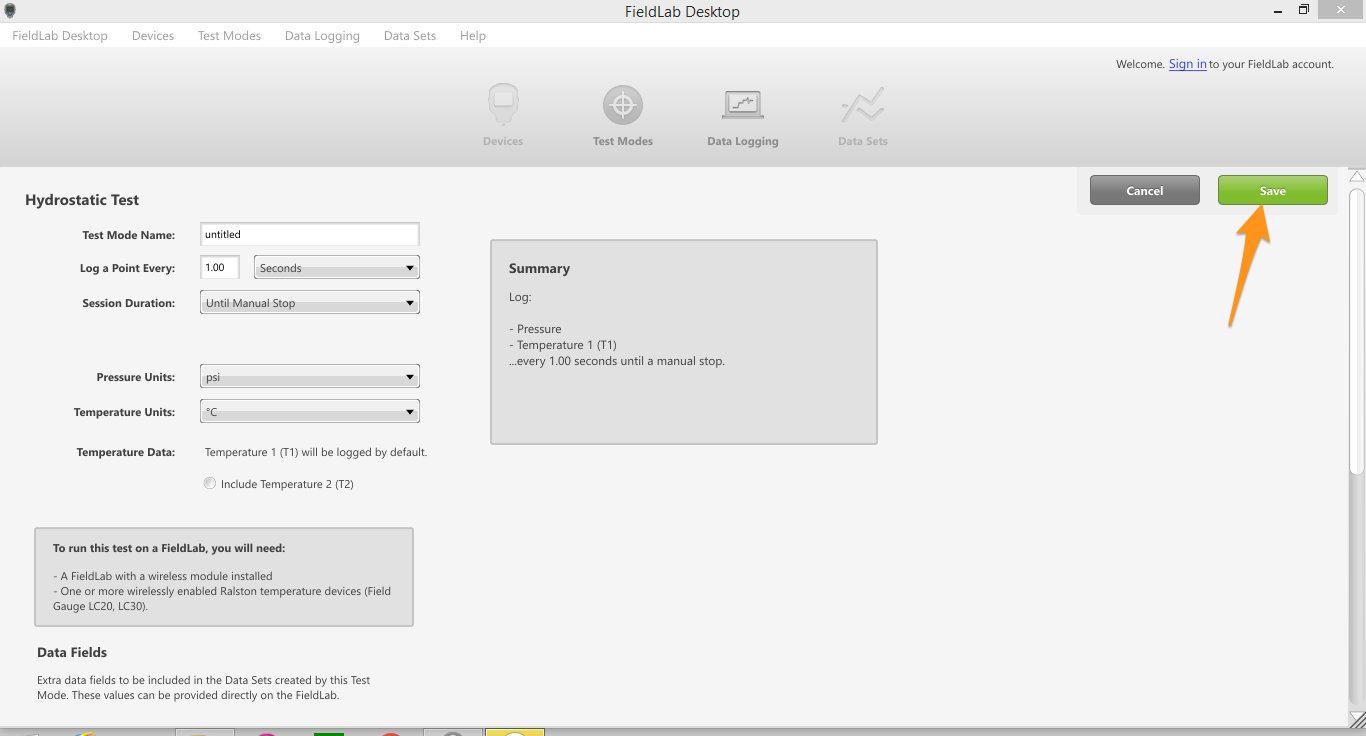
Save your changes.

Next Steps
Articles that walk you through the next things you'll need to do to run a Hydrostatic Test.
- Add Test Modes to a FieldLab.
- Run a Hydrostatic Test on a FieldLab.
Related Articles
Create a custom Pressure Safety Valve / Pressure Relief Valve Test to run on a FieldLab
Create a new valve test and add it to a FieldLab Pressure Calibrator to perform tests on pressure safety and pressure relief valves. This feature requires: FieldLab Desktop App version 1.24.0 or later installed on your PC. You can update from within ...Create a new Calibration Test
Create custom Calibration Tests to test the accuracy of any analog or digital pressure device. Once created, you can run the custom test on your computer or on a FieldLab Pressure Calibrator. 1 Go to the Test Modes Library in FieldLab Desktop. 2 ...Create a new Data Logging Test
Create a test to run on a FieldLab Pressure Calibrator that logs data according to your customized settings including Units, Logging Interval, and Session Duration. You can also create custom power management settings that apply only when your custom ...Create and Edit a Valve Test for your FieldLab Digital Pressure Calibrator: Quick Overview
This article provides a quick overview. For more detailed, step-by-step instructions, see: Create a custom Pressure Safety Valve / Pressure Relief Valve Test for a FieldLab This features requires FieldLab Desktop 1.24.0 or later. You can update to ...Add Custom Data Fields to a Test
Note: You may need to perform free updates to your FieldLab and FieldLab Desktop in order to use this feature. Available for FieldLab Desktop versions 1.10.0 and newer, and FieldLab Pressure Calibrator firmware v1.117 and newer. Instructions for ...
Recent Articles
Troubleshoot USB Power Noise Causing Pressure Reading Drift on a Ralston Gauge
Problem Unexpected pressure reading changes on an Ralston LC gauge when connected via USB. Root Cause Electrical noise is introduced through a low-quality USB hub and power supply interference. Noise from switch-mode power supplies (SMPS) can travel ...Adjust Damping on your Ralston Gauge
Damping slows the visual updates of a pressure gauge’s reading. The goal is to minimize minor fluctuations of the pressure reading on the screen caused by subtle variations in pressure that may create unwanted visual noise. Ralston gauges are set to ...Register your Ralston Gauge
Register your Ralston gauge to access calibration certificates and install firmware updates. This article applies to: FieldLab, Field Gauge LC10, LC20, and Process Meter LC30, all models. Things you will need: A PC running Windows. FieldLab Desktop ...Look Up Lead Time and Pricing for a Ralston Product
Go to ralstoninst.com Sign in to your Ralston account Select "Look Up Pricing and Lead Time by Model Number" Enter the model number of the Ralston product View the search results For each model number in your search results, info will be provided ...Download Current Price List
Get current pricing for all Ralston products Price lists are available in PDF, XLS, and CSV formats. All file formats include the following fields: Product Family (e.g. "NPT Male Quick-test Adapters) Part Number (e.g. "QTHA-2MS1") Description MSRP ...