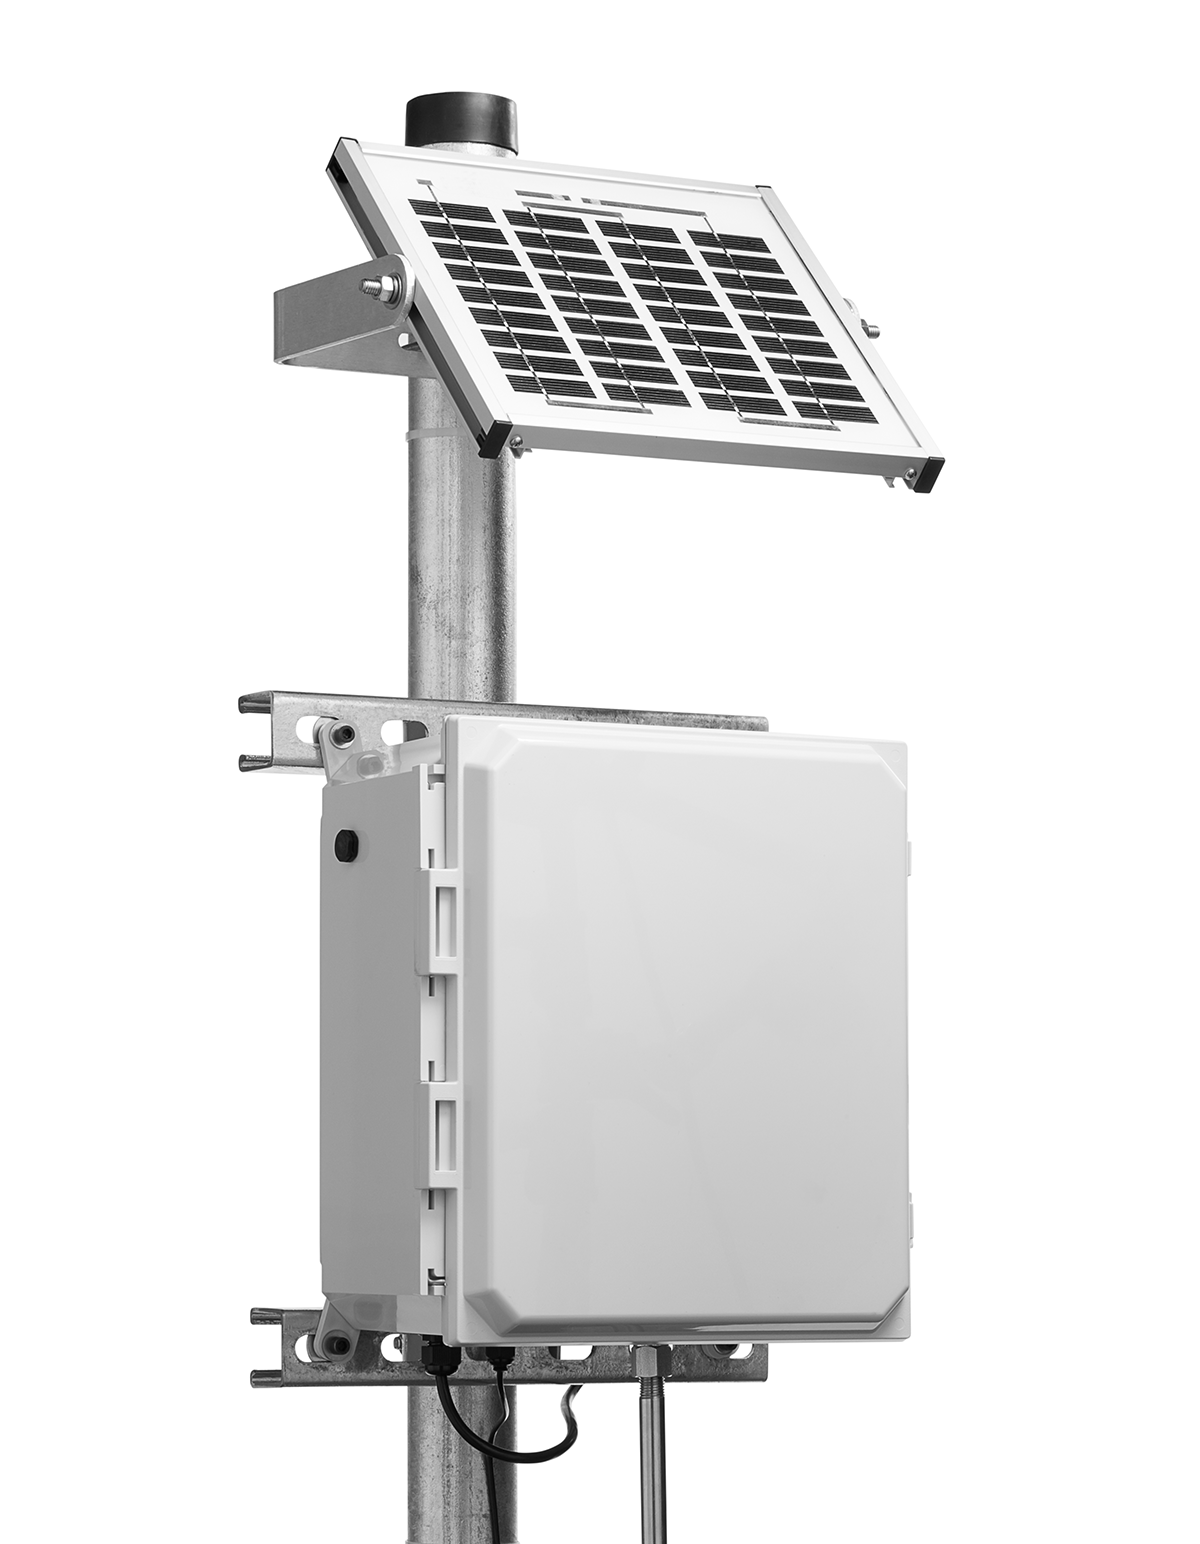
Select a location to mount the solar panel that is south-facing and close enough to the FieldLab Outdoor Enclosure that the power cord will reach and can be connected.
2
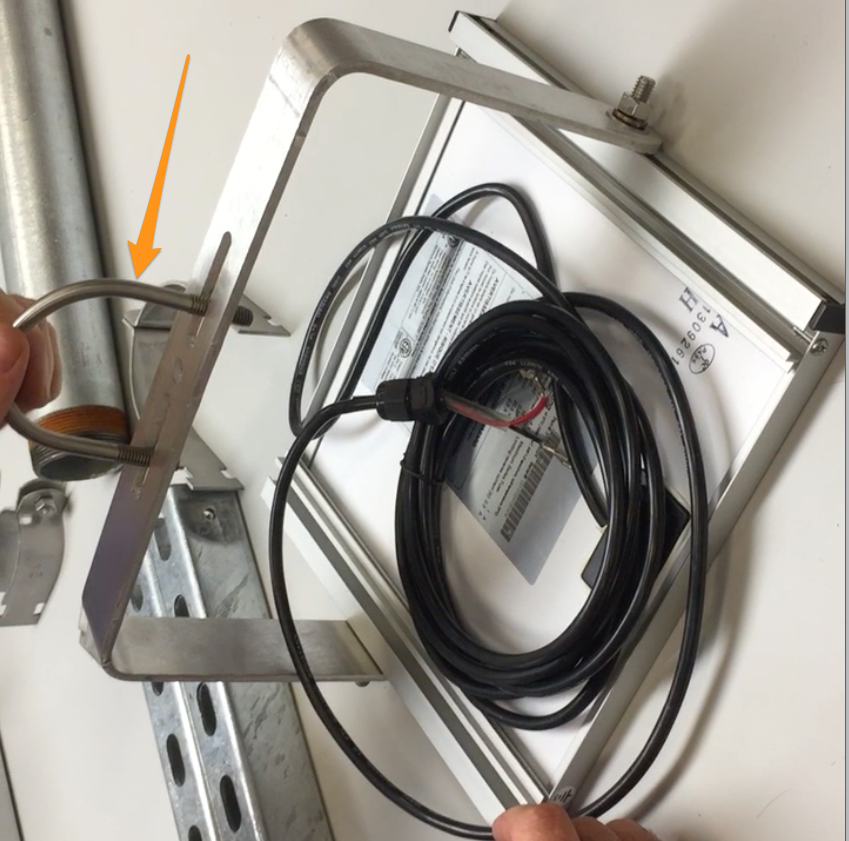
Mount the Solar Panel
Mount the to a pole or wall.
Mount to a pole
Secure the panel to a pole with the provided u-bolt and nuts.
OR
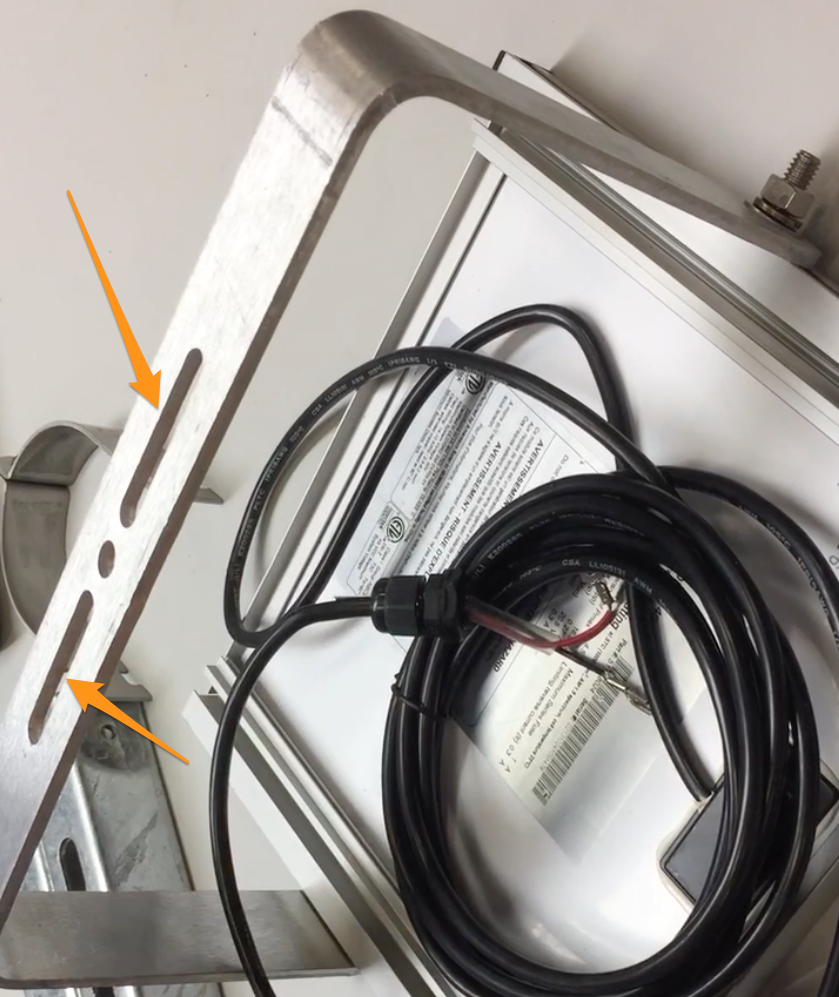
Mount to a wall
Secure the panel to a wall with lag screws.
¼", 6.35mm Diameter Max
3
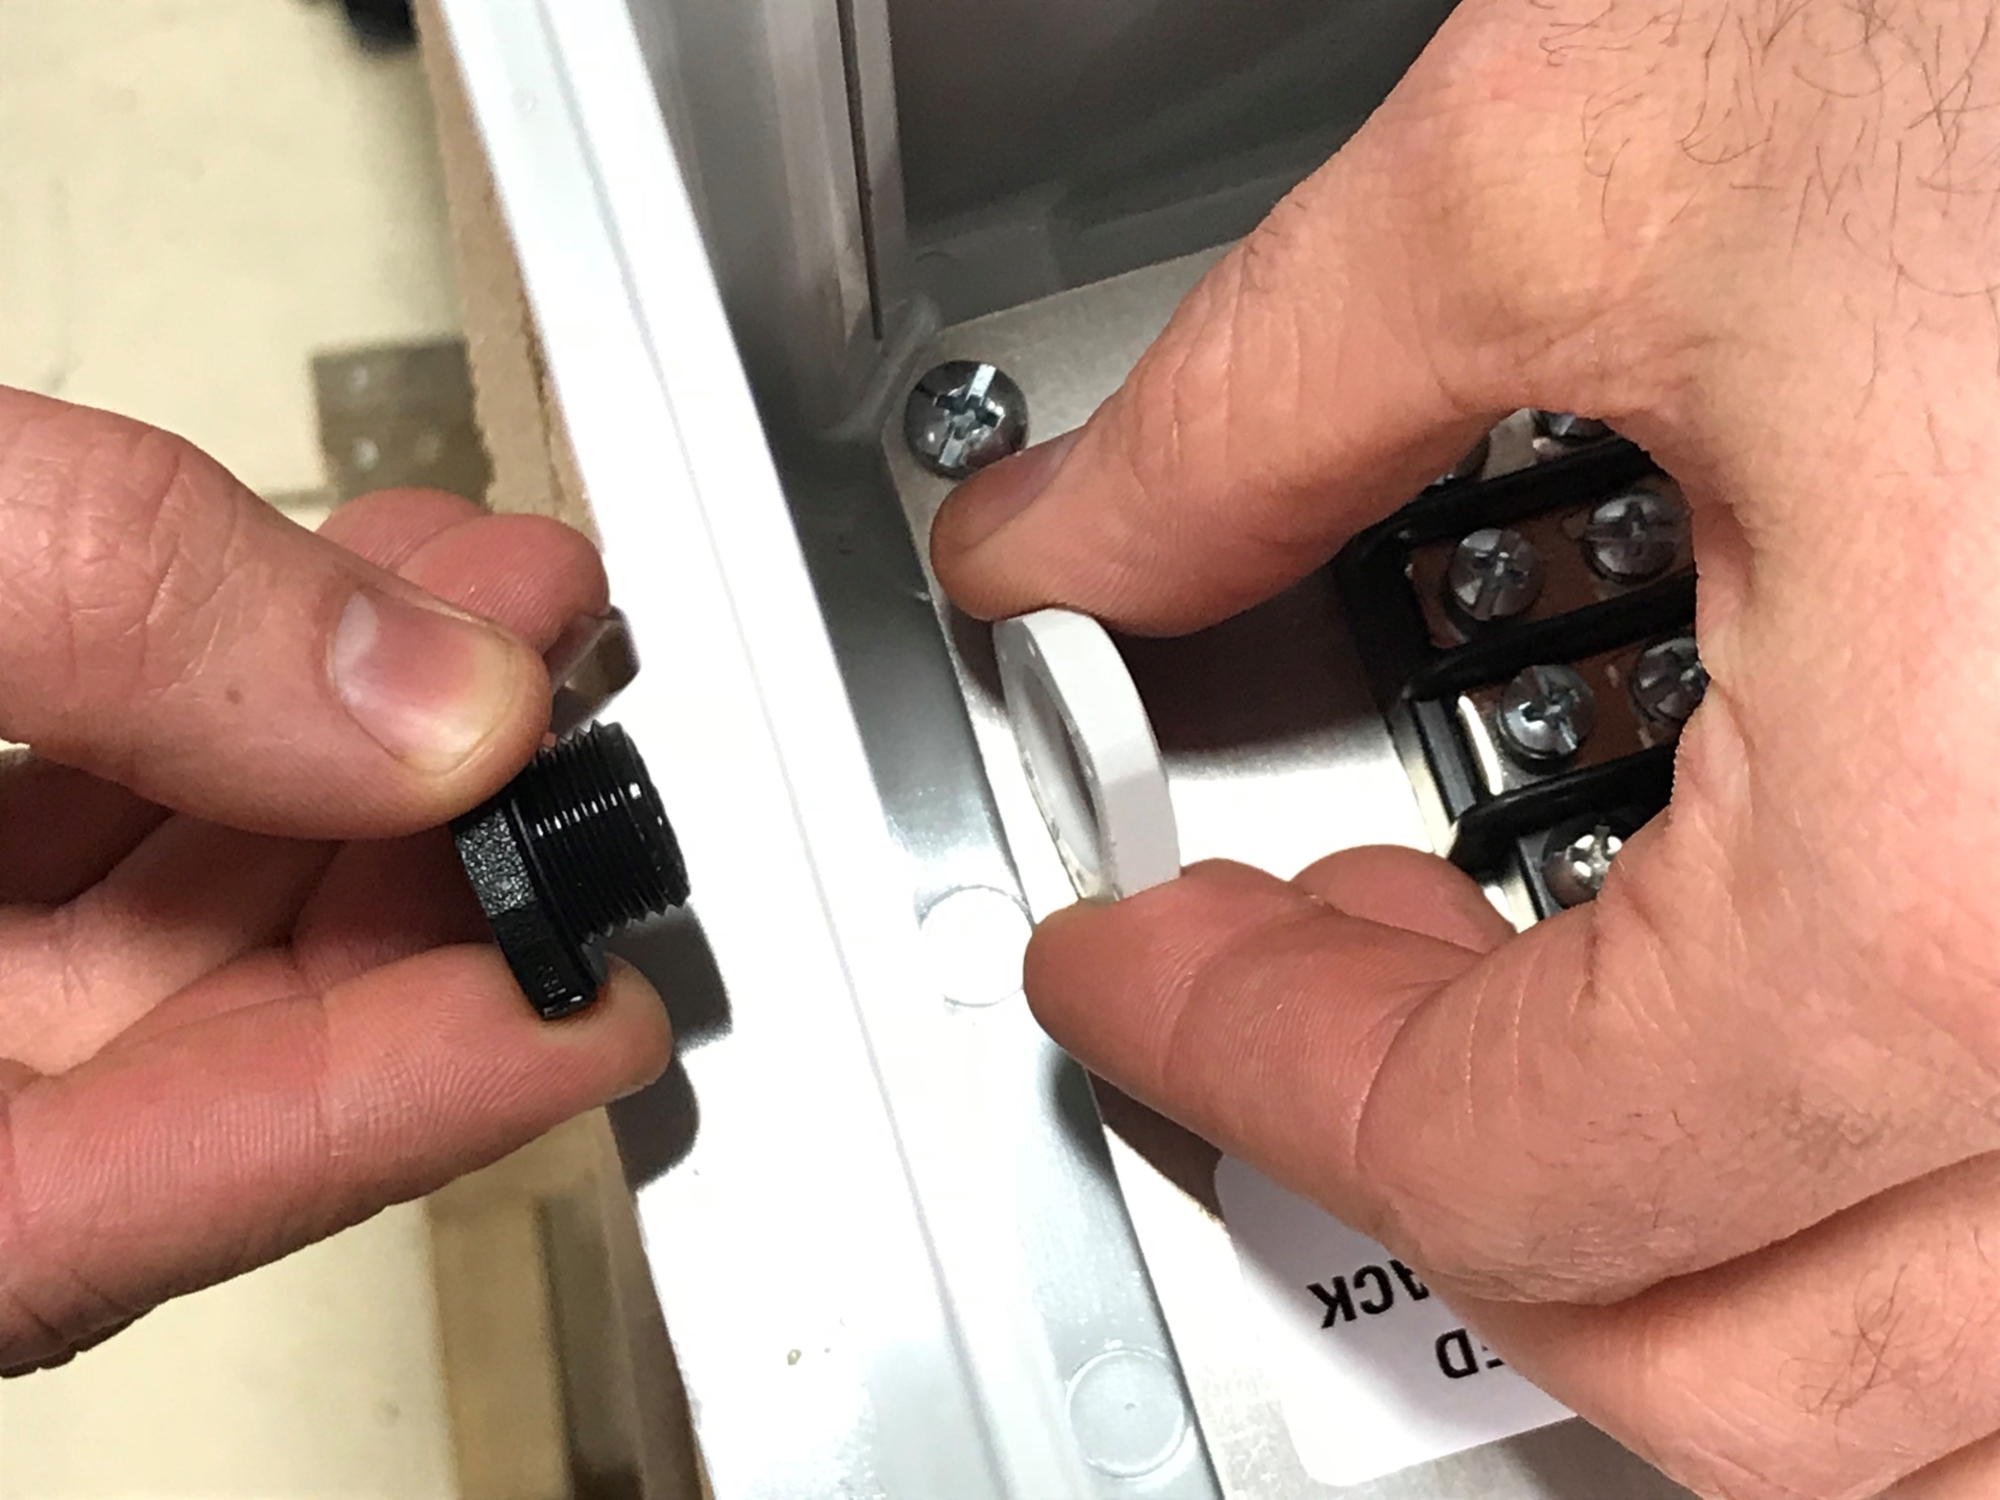
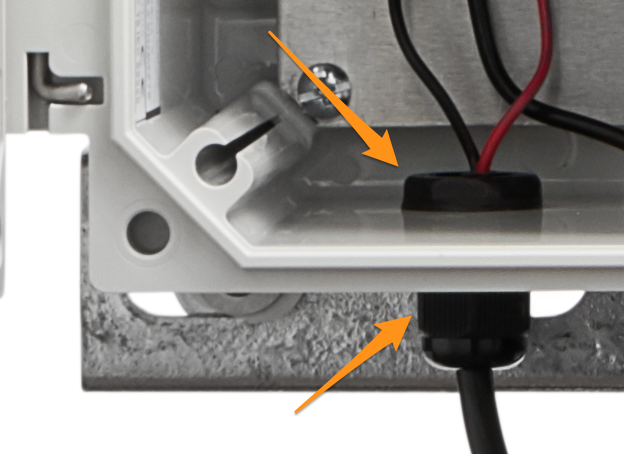
Remove the plug from the pre-drilled hole on the bottom left side of the FieldLab Enclosure.
Unscrew the plug bolt to open the hole for the solar panel power cable on the bottom-left side of the enclosure.
4
Run power cable through bottom of enclosure
NOTE: If you are required to use conduit, then run the wire in conduit, wire tray or other means into the FieldLab Outdoor Enclosure. Refer to all pertinent electrical codes. Otherwise, install liquid-tight with wires from solar panel into enclosure.
5
Secure the Bulkhead
Thread the the bulkhead screw over the red & black wires and screw it finger-tight onto the threads of the bulkhead.
6
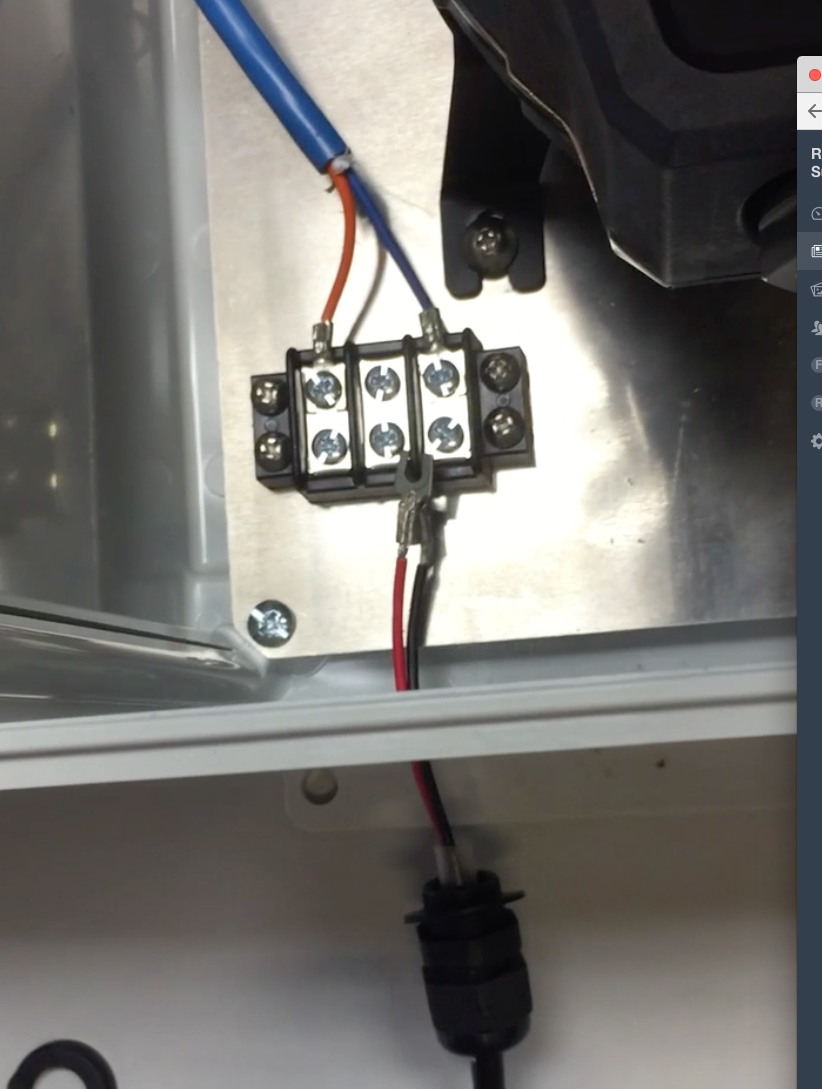
Attach Power and Ground Wires
Connect the power and ground wires to the terminal and secure them by tightening the screw for each with a screwdriver. Use the wiring diagram inside the enclosure as a guide.
Step-by-step instructions for installing FieldLab Outdoor Enclosure Kit. Note: If you already have an assembled enclosure kit and want instructions for mounting it, you can find them here: Mount FieldLab Enclosure Kit. Tools you will need: Wrench ...
Instructions for mounting to a pole or a wall. Instructions for assembling an Outdoor Enclosure Kit are here: Assemble Outdoor Enclosure Kit. Mount to a Wall 1 Attach to wall using lag screws. Secure the Enclosure Kit to a wall with four lag screws ...
Instructions for installing Wireless RF Module Assembly. 1 Power off the FieldLab 2 Using a Phillips-head screwdriver, loosen and remove the two screws at the top of the FieldLab. 3 Remove the cap panel. 4 Insert the Wireless Module with the Wireless ...
Every Ralston FieldLab Model FLP1 includes the following Intrinsic Safety Approvals: ATEX and IECEx Hazardous Locations In ATEX and IEC classified hazardous locations this apparatus is suitable for use in Class I, Zone 0, Group IIC locations as a ...
Located on the external casing of your Field Gauge All Field Gauge LC20 and Process Meter LC30 gauges are shipped with a custom sticker that contains the following information. Model Number. Model numbers ending in B1 or W1 indicate the gauge has a ...
Problem Unexpected pressure reading changes on an Ralston LC gauge when connected via USB. Root Cause Electrical noise is introduced through a low-quality USB hub and power supply interference. Noise from switch-mode power supplies (SMPS) can travel ...
Damping slows the visual updates of a pressure gauge’s reading. The goal is to minimize minor fluctuations of the pressure reading on the screen caused by subtle variations in pressure that may create unwanted visual noise. Ralston gauges are set to ...
Register your Ralston gauge to access calibration certificates and install firmware updates. This article applies to: FieldLab, Field Gauge LC10, LC20, and Process Meter LC30, all models. Things you will need: A PC running Windows. FieldLab Desktop ...
Go to ralstoninst.com Sign in to your Ralston account Select "Look Up Pricing and Lead Time by Model Number" Enter the model number of the Ralston product View the search results For each model number in your search results, info will be provided ...