Note: These instructions apply only to replacement temperature probes manufactured by Ralston Instruments.
Temperature Probe product information page: PT100 IEC Class A RTD Probe with M12 connector.
Remove the old probe and install the replacement probe on the gauge.
Power on the gauge and connect it to a computer running FieldLab Desktop with the provided USB cable.
Link the gauge to FieldLab Desktop if you haven't already done so.
Follow on-screen instructions in FieldLab Desktop to link your gauge.
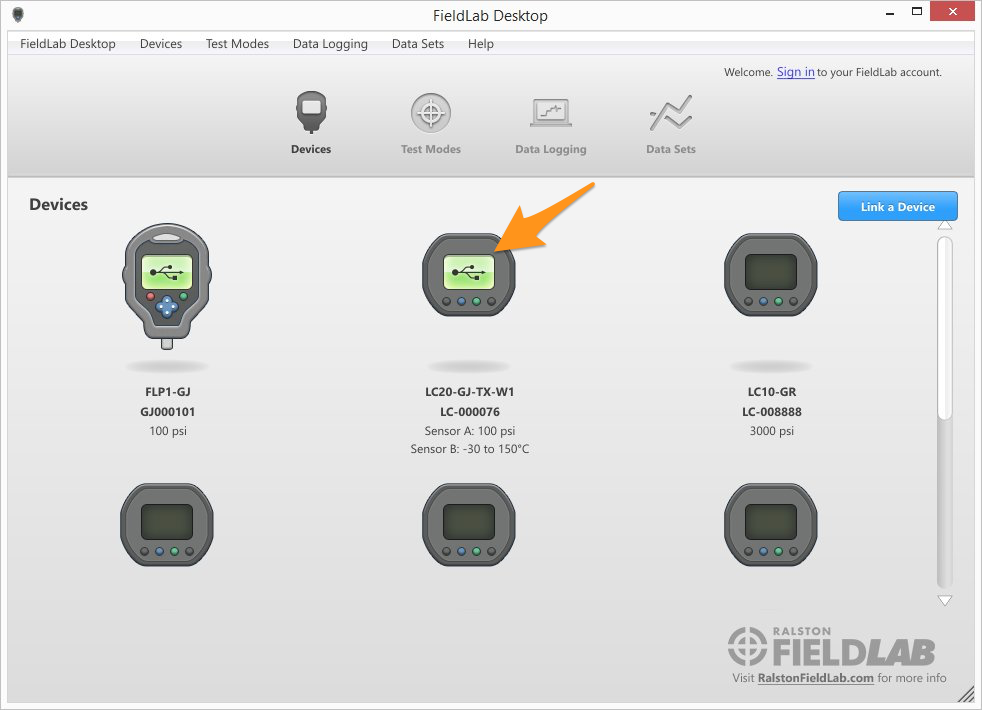
Select the device you want to pair to the new probe from the Devices screen.
Select the Sensors tab.
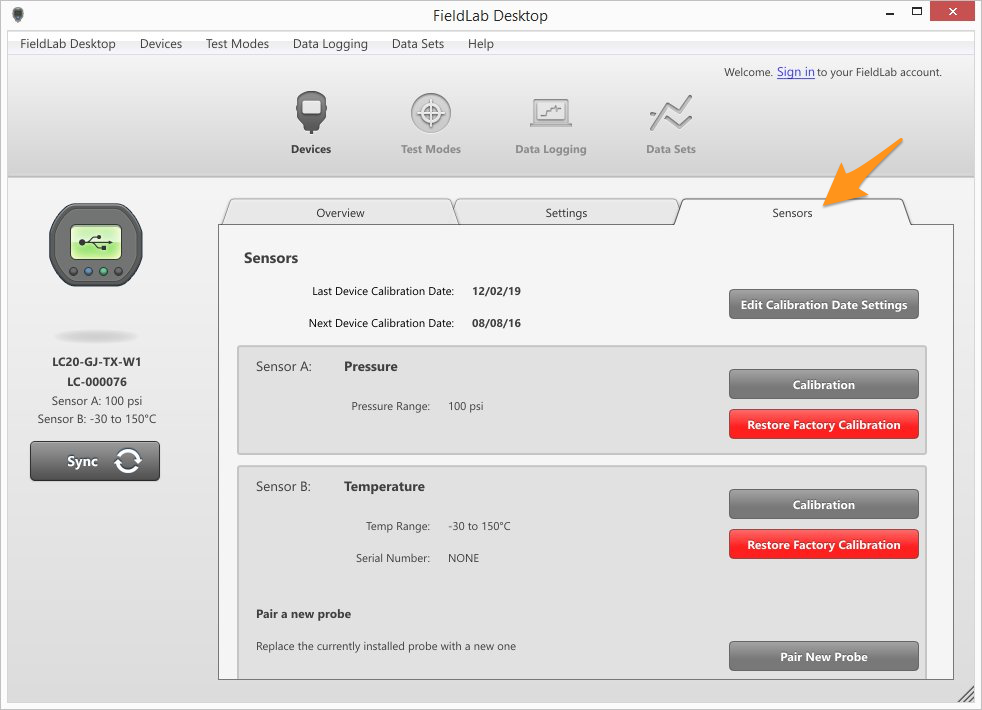
Select the Pair New Probe button.

Sign in to your FieldLab account.
If you don't have an account, select the sign-in link and create one.

Select the Pair New Probe button

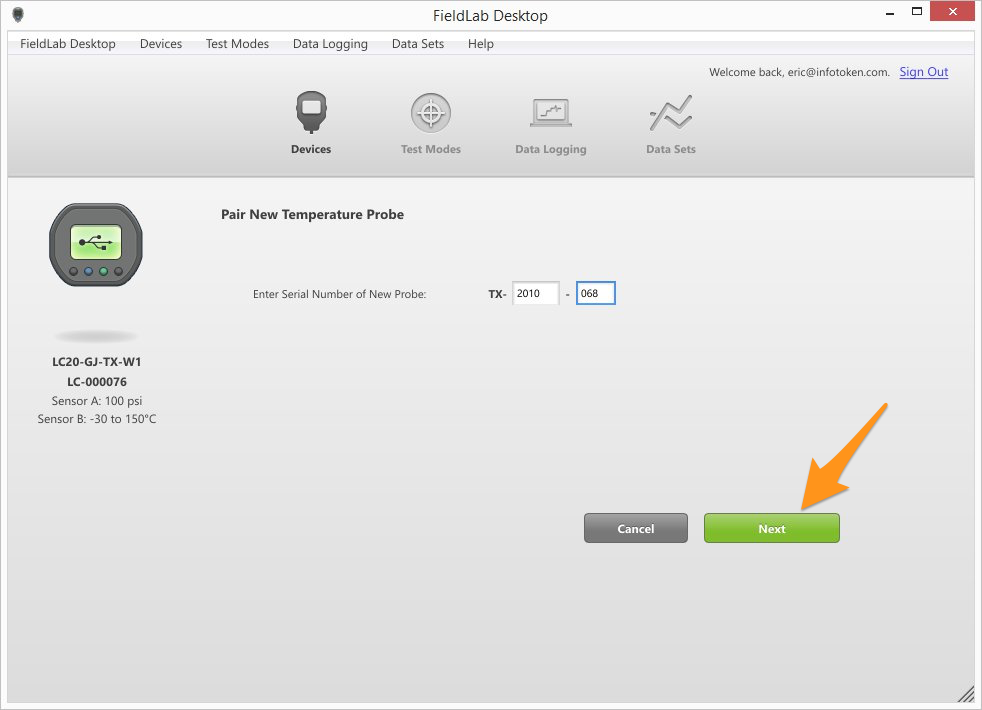
Locate the serial number on the new temperature probe.
It is the number at the bottom, listed below the product number.
It is a seven digit number laser etched into the side of the probe near the tip.

Enter the serial number of the new probe. It is a seven digit number, with a dash between the fourth and fifth numbers, laser etched into the side of the probe near the tip.

Select Next
Confirm that you want to pair by selecting the Pair New Probe button.

Select the Done button once pairing is complete.
