Replace Batteries in a Process Meter LC30
Items you will need:
- 2 fresh AA batteries
- No. 2 Phillips screwdriver
- No. 1 Phillips screwdriver
Remove screws

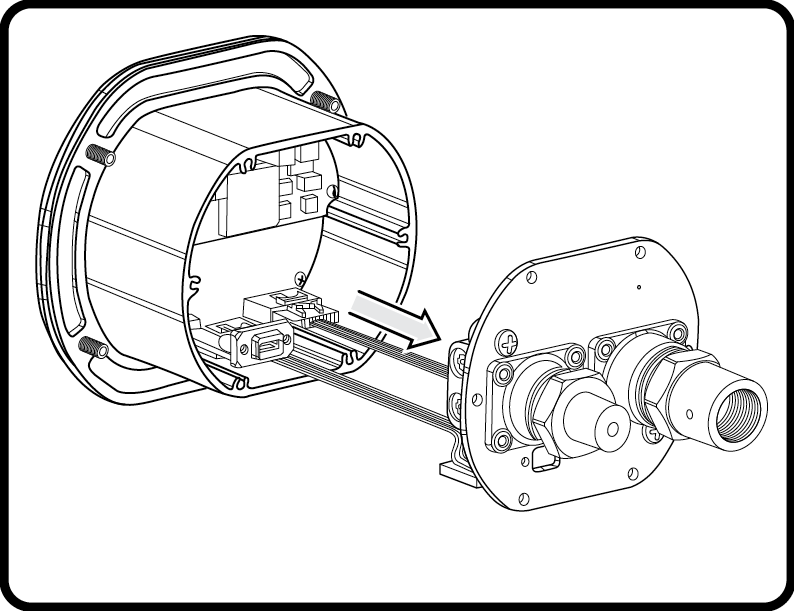
Remove back panel
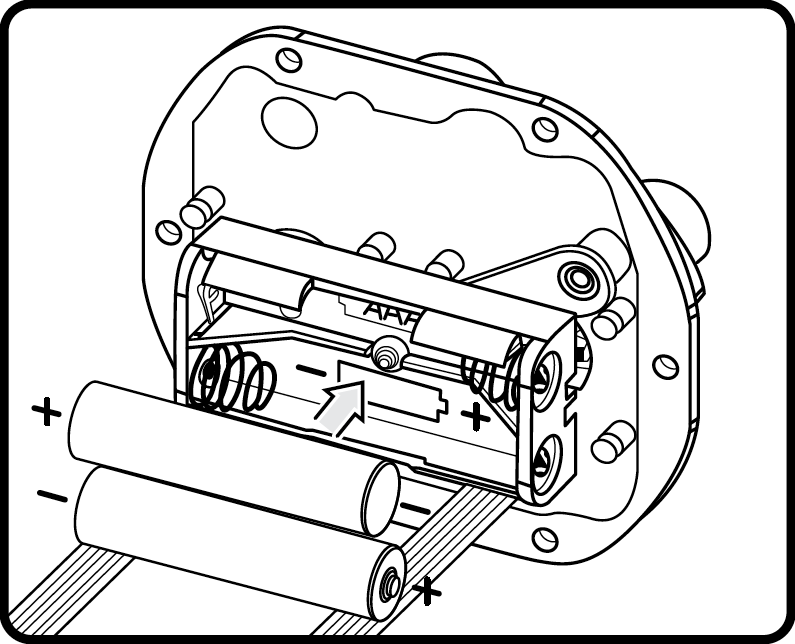
Remove expired batteries

Install fresh batteries
Reinstall back panel
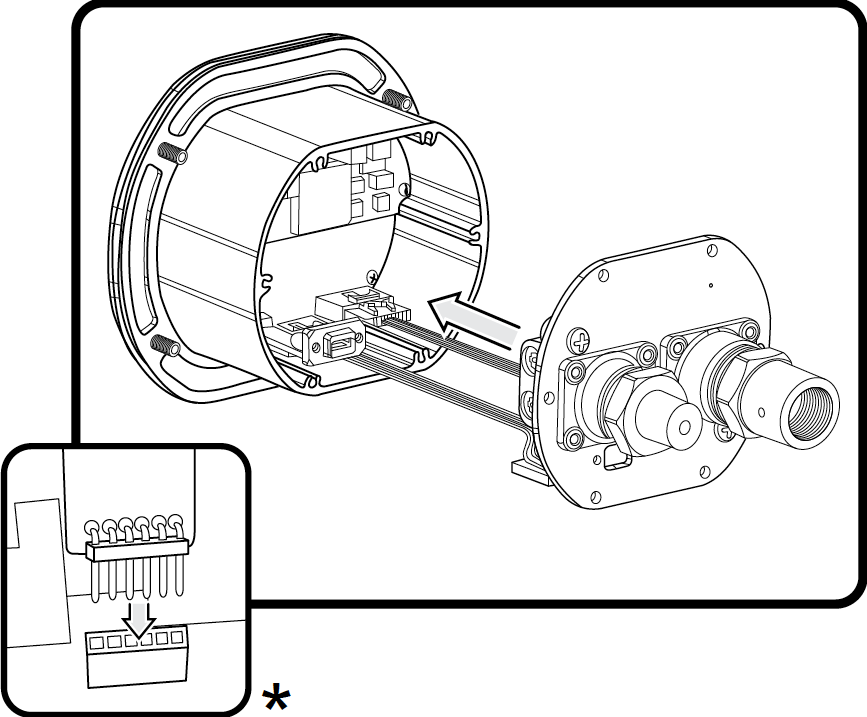
* Make sure USB PCB is seated in the main PCB.
Carefully align the USB PCB with the hole in the panel.
Reinstall screws in the back panel

Related Articles
Replace Batteries in a Process Meter LC30
* Make sure USB PCB is seated in the main PCB. Carefully align the USB PCB with the hole in the panel.Installation instructions for panel-mounting a Process Meter LC30
1. Cut holes in panel using diagram 2. Position LC30 over holes 3. Insert bolts from front and install nuts loosely in back 4. Tighten nut until snug, but not too tight 5. Connect pressure / temperature connections 6. Connect power via approved power ...Replace Batteries in a Field Gauge LC10
Power off the gauge. Remove the four screws from the back of the gauge with a 2mm hex key/Allen wrench or Phillips-head screwdriver. Older models shipped with hexagonal sockets, newer models ship with Phillips-head screws. Remove the back panel. ...Replace Batteries in a Field Gauge LC20
Power off the gauge. Remove the four screws from the back of the gauge with a 2mm hex key/Allen wrench or Phillips-head screwdriver. Older models shipped with hexagonal sockets, newer models ship with Phillips-head screws. Remove the back panel. ...Calibrate the pressure sensor on a Process Meter
Calibrate the pressure sensor on a Field Gauge, Process Meter, and FieldLab with FieldLab Desktop.
Recent Articles
Use a FieldLab to run a valve test with manual marking of crack and reseat
Use this article if you selected "Manual Marking of Crack and Reseat" when you created your valve test in FieldLab Desktop. The FieldLab interface is slightly different if you selected "Auto Detection of Crack and Reseat". To learn how to perform a ...How to obtain a Return Material Authorization (RMA) to return a product to Ralston Instruments
If you have an issue with a Ralston Instruments product we would recommend that you go to our Knowledgebase. If you have done this and still have an issue please go to our Website at www.ralstoninst.com and browse to Support. Under Support you will ...Turn Bluetooth radio on or off on a Field Gauge LC20 or Process Meter LC30
This article applies to all Field Gauge LC20 and Process Meter LC30 models equipped with a Bluetooth radio. To determine if your gauge is Bluetooth enabled: Check the last two characters in the model number printed on the gauge. If they are "B1", the ...Operation Instructions 10,000 psi Hand Pump (Model XTHP)
Add Fluid 1. Remove the vent plug 2. Add fluid to the Fluid Chamber Acceptable fluids: Ralston Calibration Oil, mineral oil, transmission fluid, water, or alcohol. Add around 2 inches of fluid, or enough fluid to keep the bottom of the fluid ...Operation Instructions 5000 psi Hand Pump (Model QTHP)
Add Fluid 1. Remove the Vent Plug at the top of the Fluid Chamber 2. Add fluid to the Fluid Chamber Acceptable fluids: Ralston Calibration Oil, mineral oil, transmission fluid, water, or alcohol. Remove the vent plug and add around 2 inches of fluid, ...