Log pressure and/or temperature data to your computer with FieldLab Desktop
Monitor and log pressure and temperature data to your computer with one or more Ralston Gauges.

This article applies to the following products:
- Field Gauge LC10, all models
- Field Gauge LC20, all models
- Process Meter LC30, all models
- FieldLab Digital Pressure Calibrator, all models.
Things you will need:
- A PC running Windows.
- FieldLab Desktop software version 1.24.7.0 or later is installed on your PC. Update to the latest version from within the app, or download the latest version for free.
- Ralston Instruments Field Gauge, Process Meter, or FieldLab Digital Pressure Calibrator.

When you use the Data Logging feature in FieldLab Desktop, the data is read from the connected gauges and saved directly to your computer.
If you are connected to gauges wirelessly, any connection drops during the logging session due to interference, devices being moved out of range, etc, will result in lost data.
Instructions for FieldLab Desktop versions 2.0 and later
1. Connect one or more Ralston Gauges to your computer.
Gauges can be connected either via a USB cable or wirelessly (if the gauge has wireless radio features installed).
2. Confirm that the Gauges you want to use for your logging session are connected.
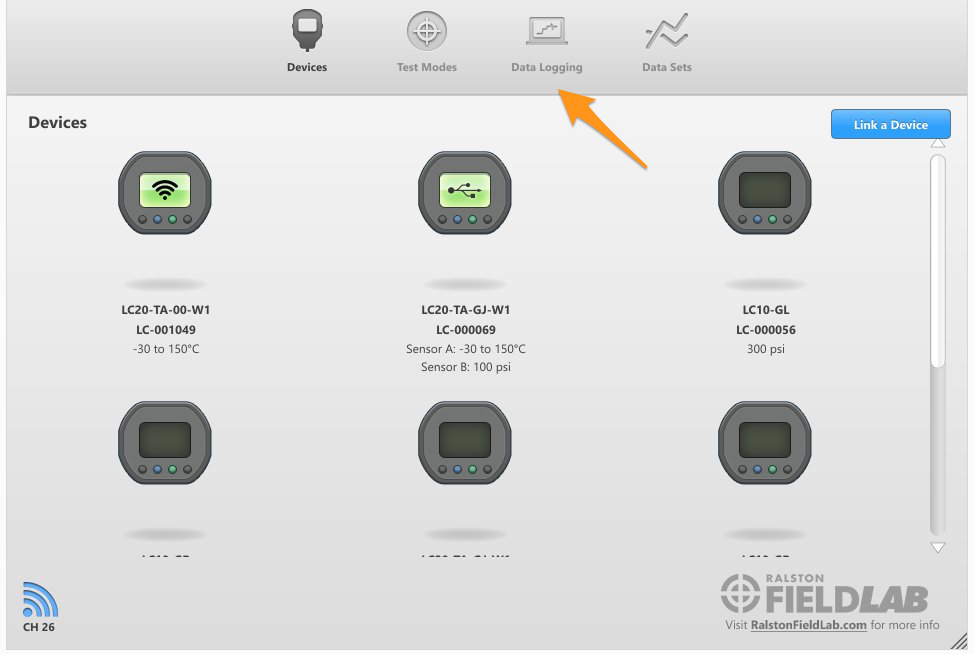
All connected Gauges will be displayed on the Gauges screen in FieldLab Desktop. In this example, we're using a FieldLab and a Field Gauge LC20 Thermal Probe.
All connected Gauges will be displayed on the Gauges screen in FieldLab Desktop. In this example, we're using a FieldLab and a Field Gauge LC20 Thermal Probe.
3. Select 'Data Logging' in the main navigation bar.
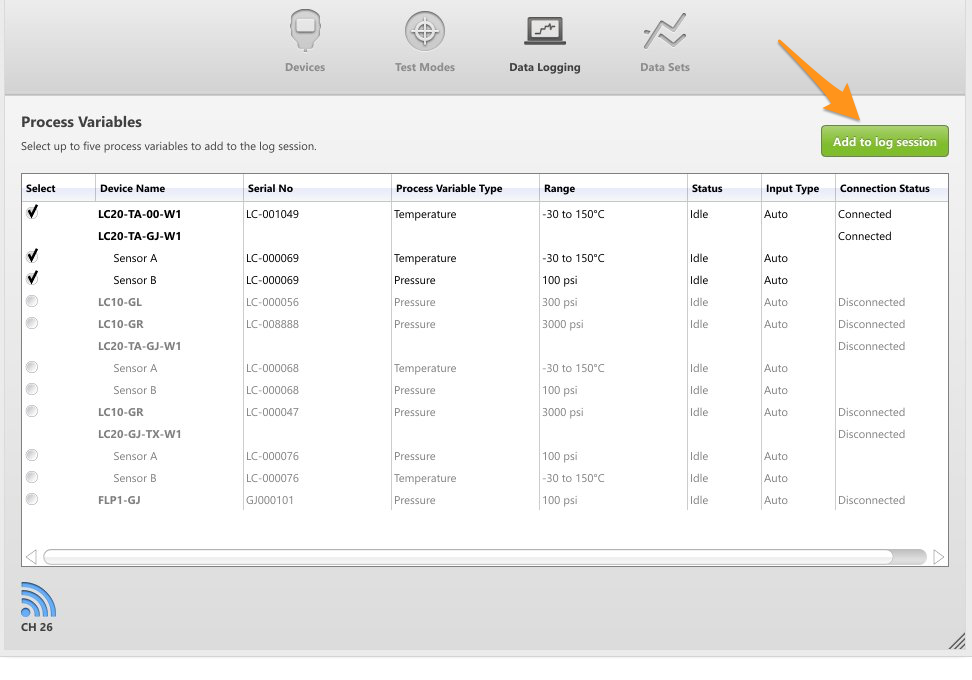
4. Select the sensors from each gauge you want to use for the test.
5. Select 'Add to Test'.
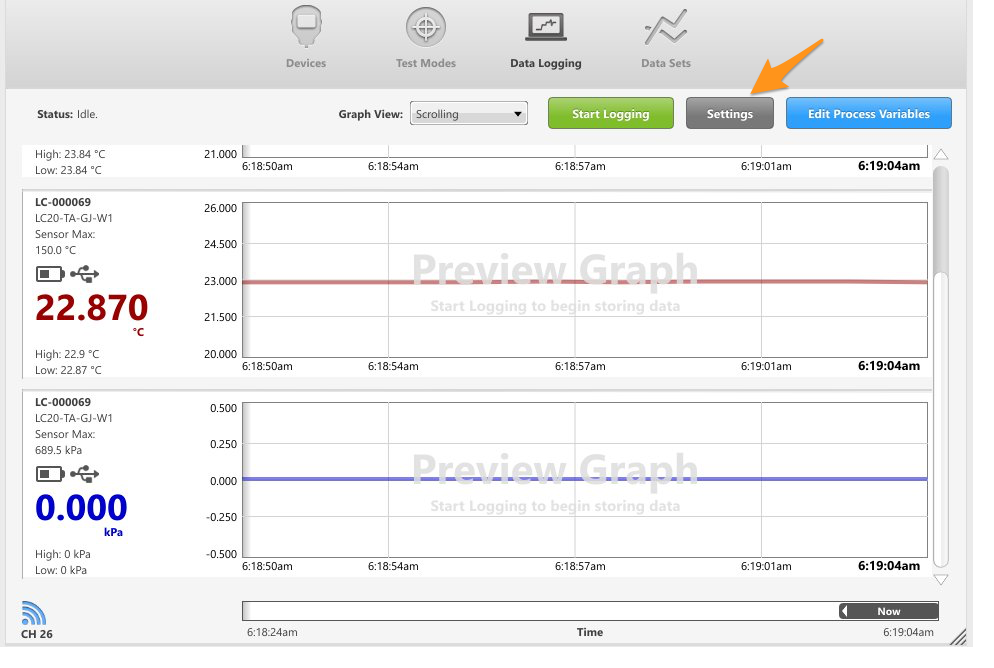
6. Confirm or adjust the test settings before you start logging. Select 'Settings'.
7. Set and save the desired logging interval, pressure units, temperature units, and session duration for your test.
8. Select "Start Logging."
9. When the test is complete, select "Stop Logging."
10. View your saved test data by selecting the linked file or by navigating to Data Sets.

Related articles:
Instructions for FieldLab Desktop versions 1.0 through 1.44.8
1. Open FieldLab Desktop on your computer.
2. Power on your Ralston Gauge or Process Meter.
3. Connect your Ralston Gauge to your computer with the provided USB cable or wirelessly.
4. Select Data Logging from the main menu in FieldLab Desktop.
5. Select one or more connected devices, then select Add to Log Session.
In this example, we are selecting one LC20 Temperature Gauge and one LC20 Dual Sensor Field Gauge. We are selecting both the temperature and pressure sensors for the LC20 dual-sensor Field Gauge.
Based on our selections, our log session will save two temperature readings and one pressure reading.
Optional: Adjust the settings before you start logging
Before you begin your logging session, you can adjust the settings for:
- Pressure Units - Choose from any universally accepted engineering unit or Custom Units as defined in FieldLab Desktop.
- Temperature Units - Choose temperature units in °F, °C, °R, or K.
- Session Duration - You can set your log session to automatically stop after a specified length of time, until a total number of points are logged, or use the default manual stop.
Optional: Use a Custom Pressure Unit
If you have defined a Custom Pressure Unit in your Preferences, then the Custom Unit will appear at the bottom of this list. The Custom Unit does not have to be added to the gauge itself.
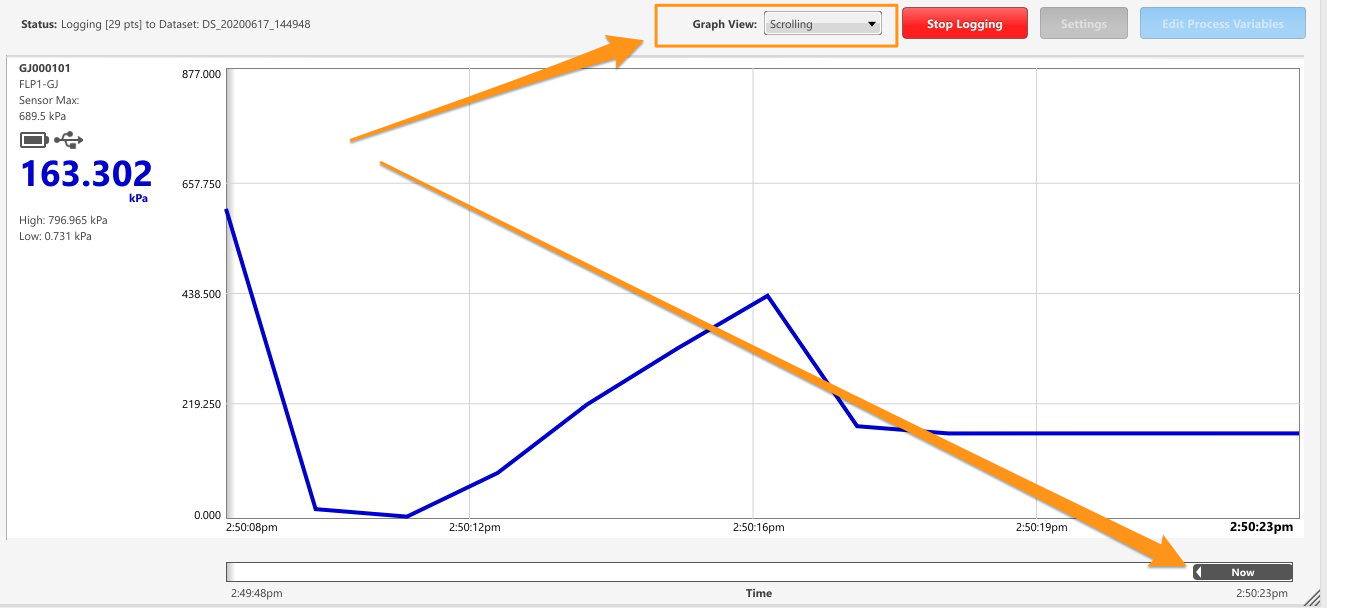
Optional: Change the Graph View
Note: You can change the graph view at any time during the logging session.
Entire Log
Setting the Graph View selection to "Entire Log" will show all the graph data from the time you started logging.
Scrolling
When you select "Scrolling", only the most recent graph data will be shown, and older graph data will scroll off the left side of the screen as time progresses.
You can use the slider tool at the bottom of the screen to scroll back and view older graph data.
6. Select Start Logging
Once you've confirmed you have the desired settings for the logging session, select Start Logging to begin saving the data from your gauges to your computer.
7. Stop Logging
If you have the Setting for your log session set to Manual Stop, select the Stop Logging button when your session is finished.
If you specified automated stop rules in the settings before beginning your log session, you will not need to select the Stop Logging button; FieldLab Desktop will stop automatically once the specified stop criteria are met.
All data from your log sessions is saved to Data Sets. You can go to the Data Sets section of FieldLab Desktop to view and export the data from all of your log sessions.
