Make a Wireless Connection between a FieldLab and FieldLab Desktop
Import Data Sets, add custom tests, and monitor live pressure readings remotely via a wireless connection.

Things you will need:
1. An IEEE 802.15.4 radio module is installed on your FieldLab.
2. An IEEE 802.15.4 radio USB dongle for your PC.
Included with the purchase of all FieldLabs with radio modules installed.
3. FieldLab Desktop software is installed on your Windows PC.
If you own a FieldLab and want to upgrade it to a wireless model, conversion kits are available.
Instructions for FieldLab Desktop versions 2.0 and later
1. Open the FieldLab Desktop app on your computer.
2. Plug the provided IEEE 802.15.4 radio USB dongle into a USB port on the computer.
Once your computer recognizes the USB device, a wireless icon with a number beneath it will appear in the top-right corner of FieldLab Desktop. The number indicates the radio channel FieldLab Desktop is set to.
3. Power on the FieldLab.
4. Open the Menu on your FieldLab by pressing the Menu Button.
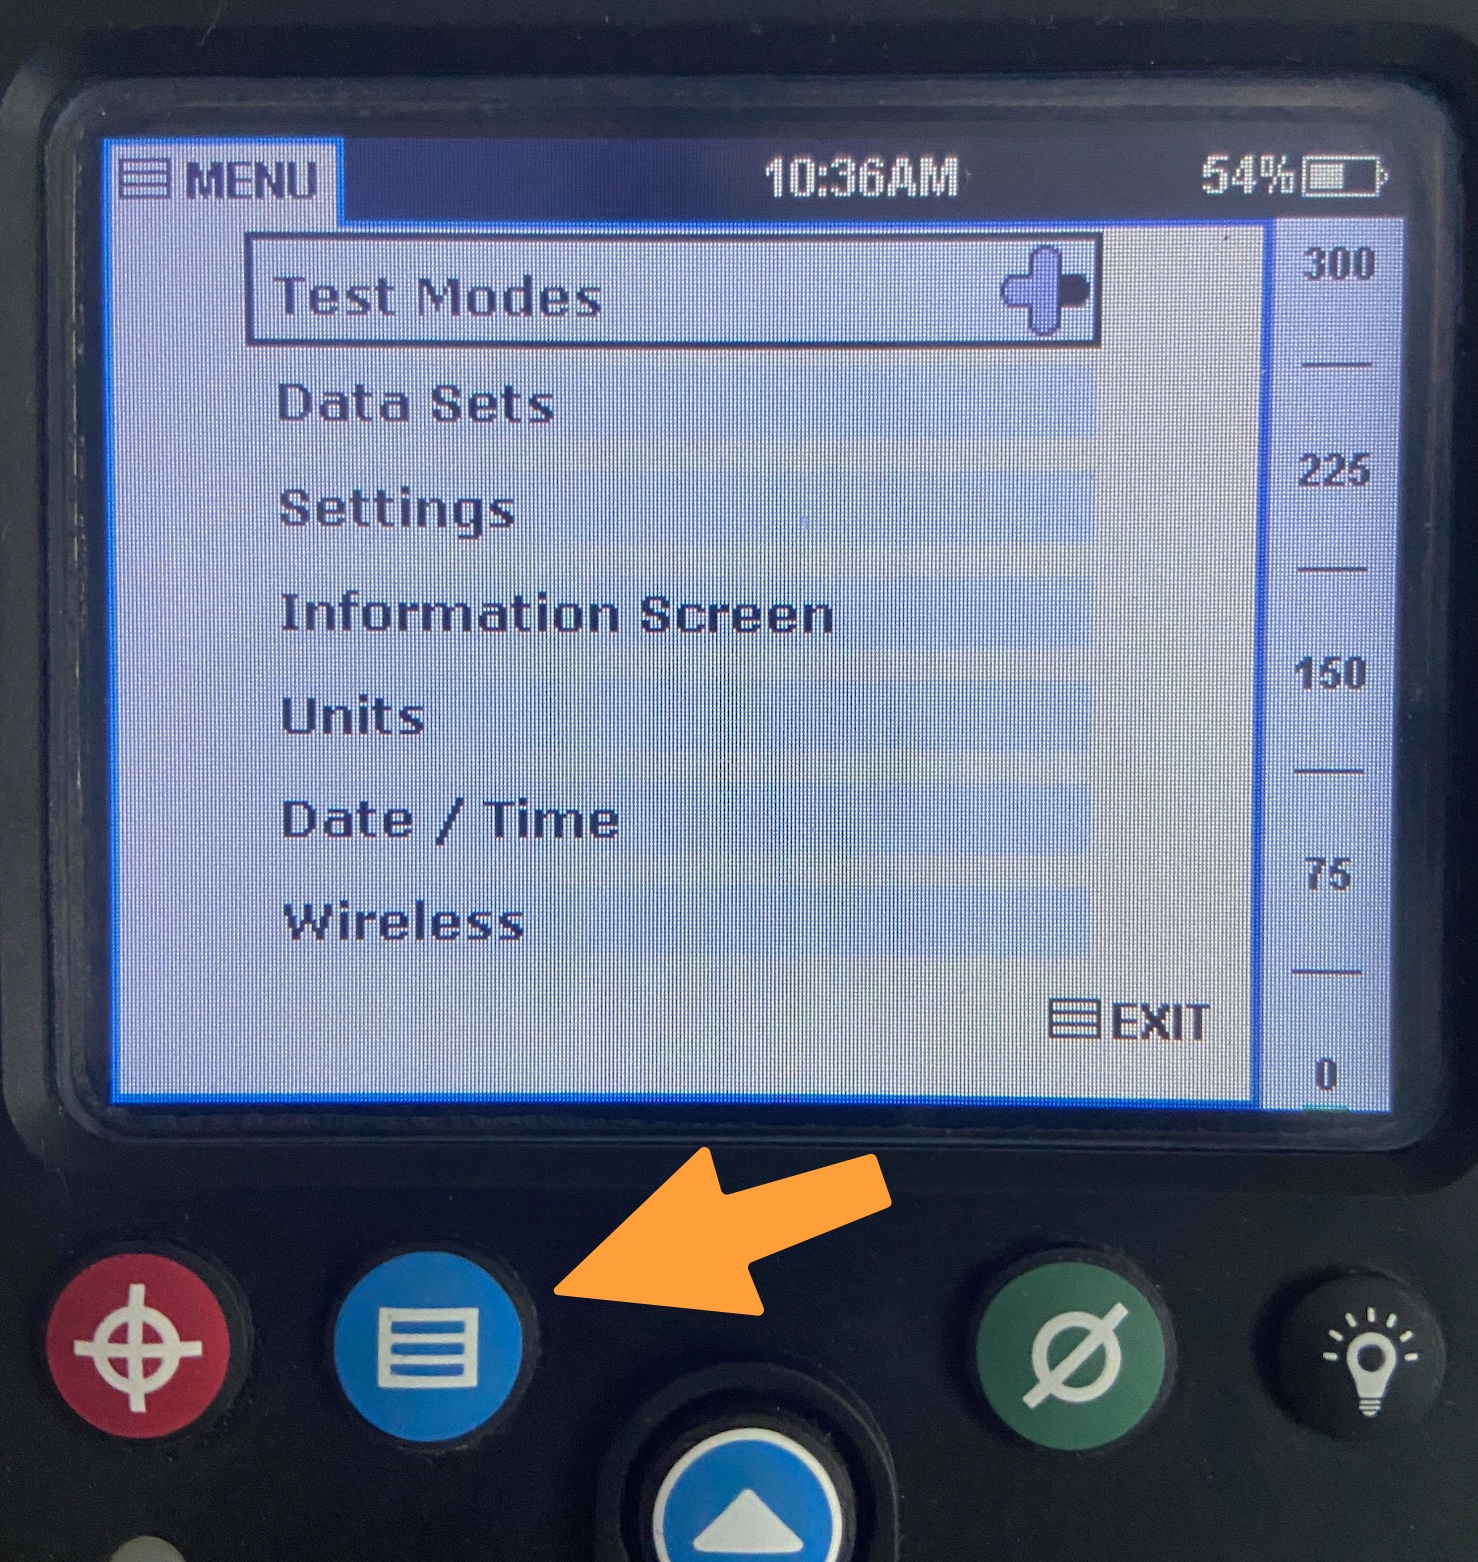
5. Scroll down to the "Wireless" menu item by using the Down-Arrow button.
6. Enter the "Wireless" submenu by pressing the Right-Arrow button.
7. Confirm that the FieldLab is set to the same Wireless Channel as the FieldLab Desktop app.
FieldLab Desktop and the FieldLab must be on the same radio channel in order to communicate. Radio channel numbers can range from 11 to 26.On the FieldLab, compare the radio channel number in parenthesis on the menu item titled "Wireless Channel (XX)" to the number under the wireless icon in FieldLab Desktop.If the channel numbers match, then proceed to step 9.
If the channel numbers do not match:8.1) On the FieldLab, scroll to the "Wireless Channel" menu item using the arrow buttons on the FieldLab.8.2) Access the "Wireless Channel" setting screen by pressing the Right-Arrow button.8.3) Use the arrow buttons on the FieldLab to scroll to the channel number that matches the channel number displayed under the wireless icon in FieldLab Desktop.8.4) Save the newly selected channel by pressing the center Magnifying Glass / Zoom button on the FieldLab.8.5) Go back to the "Wireless" submenu by pressing the Left-Arrow button.
9. Scroll to the menu item titled "Connect Wireless Link".
10. Push the Right-Arrow button to turn on the wireless radio. It will take around 40 seconds for the FieldLab to establish a connection. Once the connection is established, a FieldLab card will appear on the Gauges screen in the FieldLab Desktop app.
Instructions for FieldLab Desktop versions 1.0 through 1.448
1. Open the FieldLab Desktop app on your computer.
2. Plug the USB dongle into the computer.
Once your computer recognizes a new USB device, you will see a wireless icon in the bottom-left corner of FieldLab Desktop.
3. Power On your FieldLab.
4. Open the Menu on your FieldLab.
5. Scroll down and select the "Wireless" menu item.
6. Select "Connect Wireless Link".
7. Wait for the FieldLab to establish a connection (about 30-40 seconds).
8. Confirm that the wireless connection has been established
The wireless icon will display on your FieldLab once a wireless connection is established.
9. Make sure the FieldLab and FieldLab Desktop are on the same channel.

Related articles
Learn how to: Change Wireless Channel on a FieldLab.