Run a pressure relief valve test, manually log crack and reseat
Designed for testing valves that require a technician's expertise to determine the exact pressure at which the valve cracks.
Ideal for scenarios where the crack is determined when the first steady stream, or first continuous flow, of liquid media begins to emerge from the valve.
This features requires FieldLab Desktop version 1.24.0 or later. Download the latest version for free.
This feature requires FieldLab Firmware version 1.123 or later. You can update the firmware on a FieldLab by linking it to FieldLab Desktop software with the provided USB cable. Follow this link for Step-by-step instructions for updating FieldLab Firmware.
Before you can run a Test Mode, you must first Create a PSV/PRV Test Mode and add it to the FieldLab. For instructions, see:
- Create a custom Pressure Safety Valve / Pressure Relief Valve Test for a FieldLab
- Add Test Mode to a FieldLab
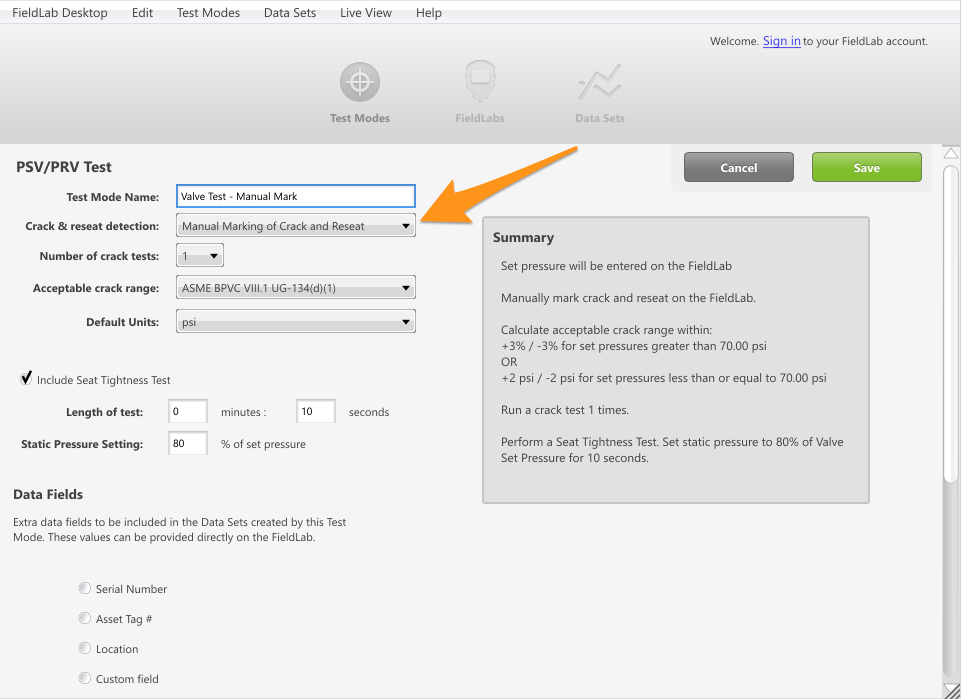
Create a PSV/PRV Test on FieldLab Desktop
On the crack & reseat detection field, be sure to select "Manual Marking of Crack and Reseat."
Full step-by-step instructions for creating a PSV/PRV Test are here (link will open in a new browser window).
Add the test to your FieldLab
Connect your FieldLab to your computer with a USB cable, or wirelessly, and add the test to it with FieldLab Desktop. For full instructions, see Add Test Modes to a FieldLab.
Make the proper connections.
Make airtight connections between the FieldLab Pressure, a pressure source, and the PSV/PRV.

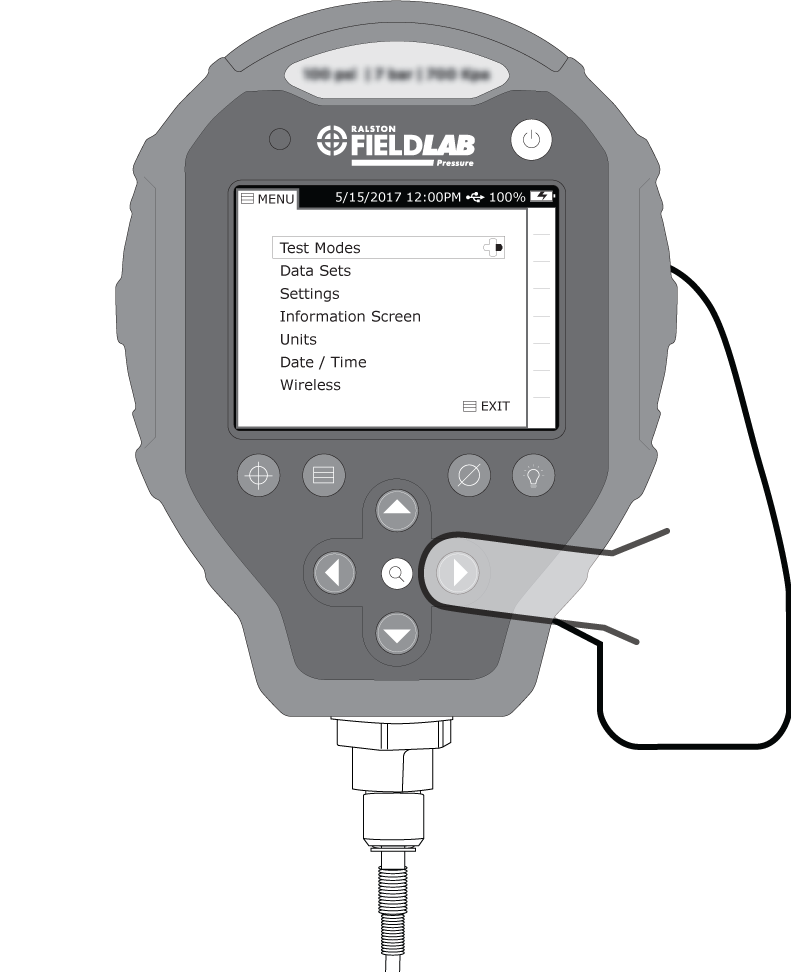
To Activate the Test Mode, Open the Menu by pressing the Menu Button.

Select Test Modes from the Menu
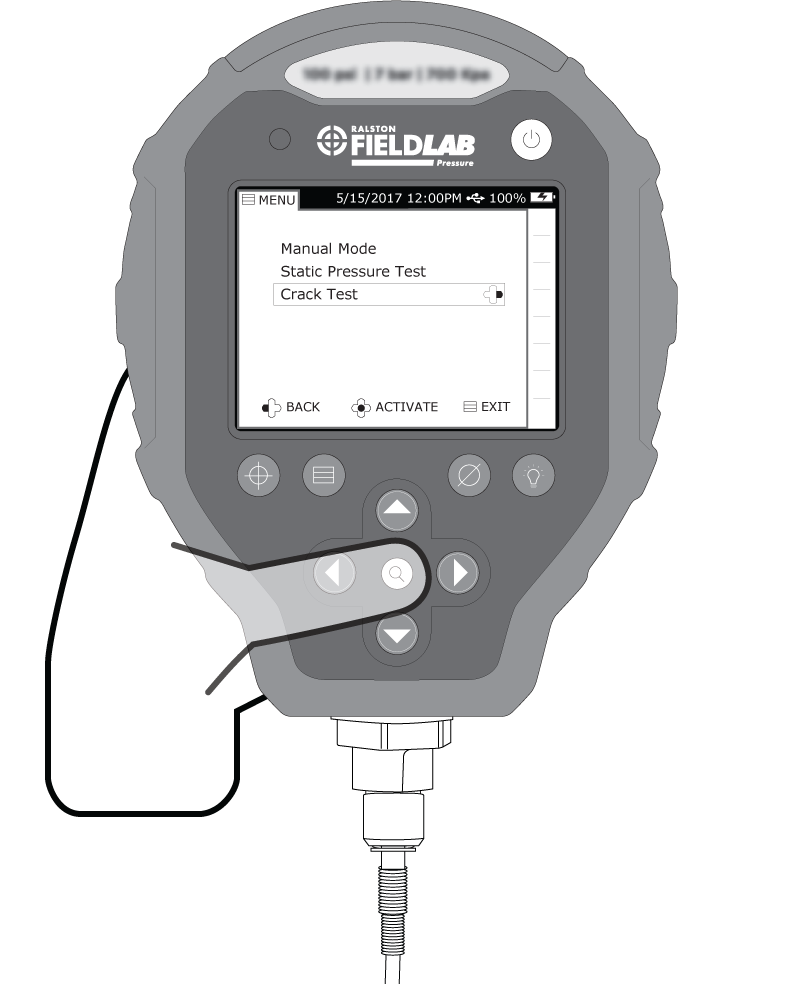
Select and Activate the PSV/PRV Test
Once test mode is activated, select Enter Set Point
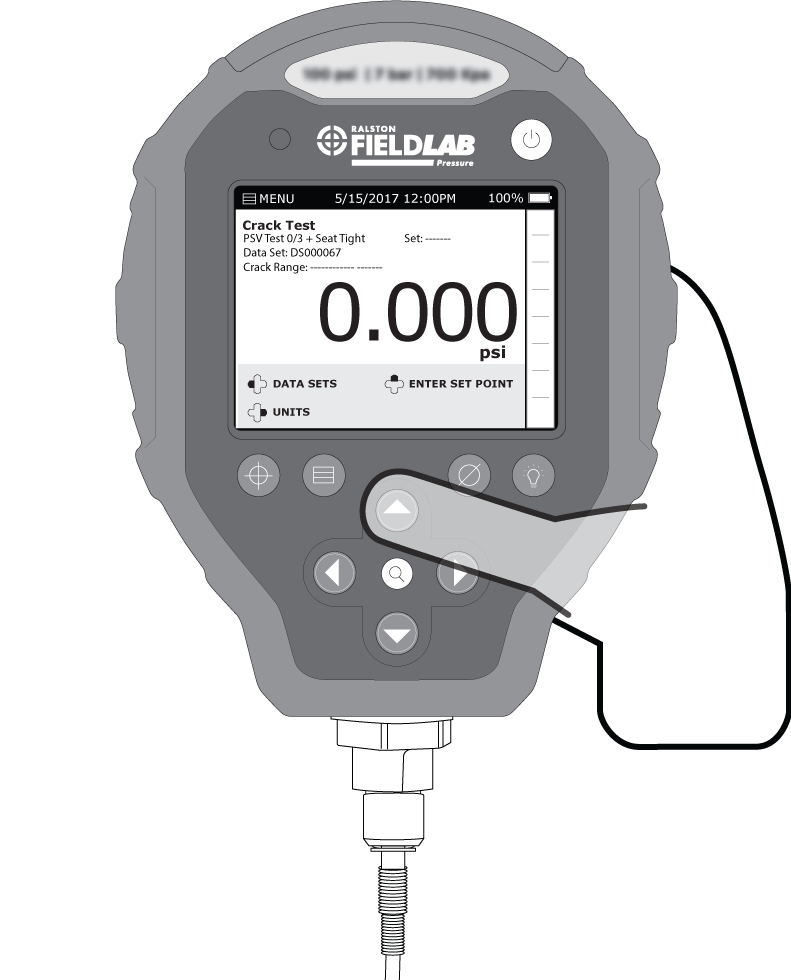
Input the set pressure for the PSV/PRV being tested using the on-screen keypad. Once
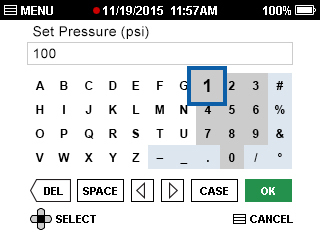
When you are ready to apply pressure to the valve, select START LOGGING
When you select START LOGGING, the gauge will begin recording the pressure applied to the valve and won't stop recording until you select STOP LOGGING.

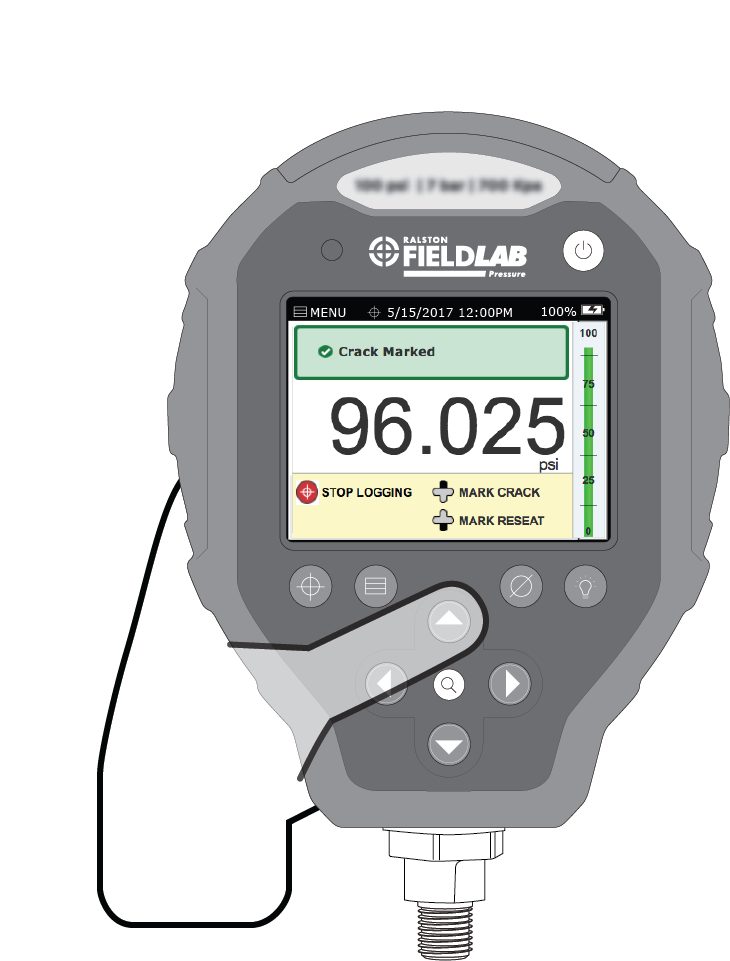
Gradually increase pressure until you detect a crack in the valve.
Select MARK CRACK when you notice the valve has cracked.
When you select MARK CRACK, the FieldLab will save the reading for the valve pressure at the time of the crack.
You can mark the crack as many times as you want during the course of the test, and the FieldLab will save only the last one marked.
Slowly decrease pressure until the valve reseats
Select MARK RESEAT when you see that the valve has reset
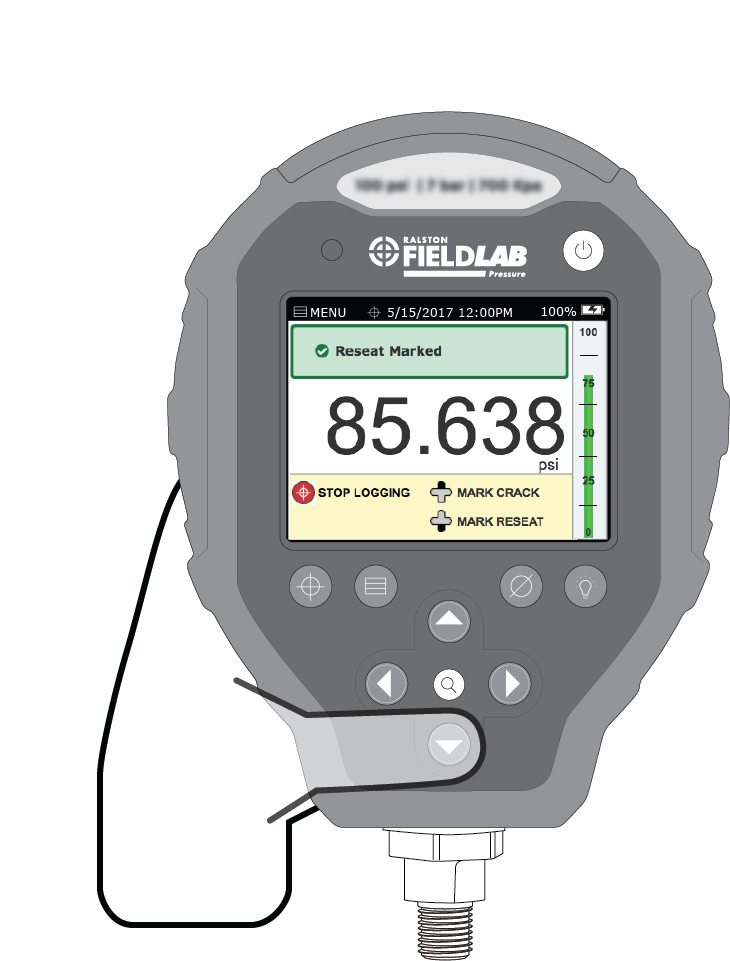
Once you have marked the crack and reseat, select STOP LOGGING
Select ACCEPT it if you are satisfied with the results.
Review the data collected. If you are satisfied with the results, select ACCEPT.
You can also select RELOG to delete the results and run the test again.
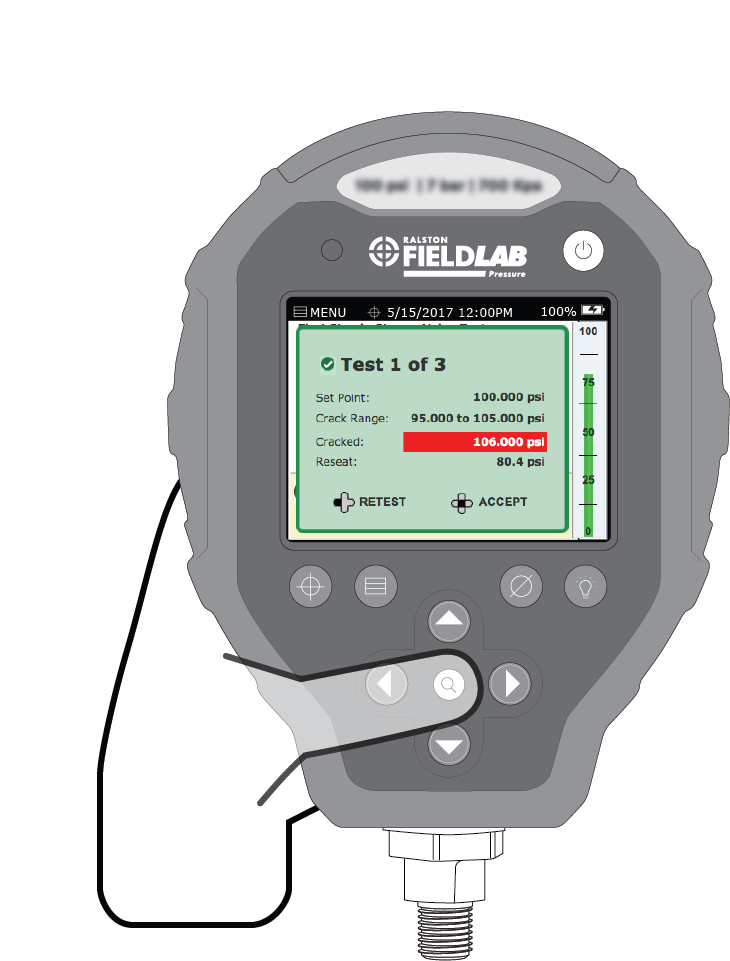
Repeat the above steps if your Test Mode has more than one crack test.
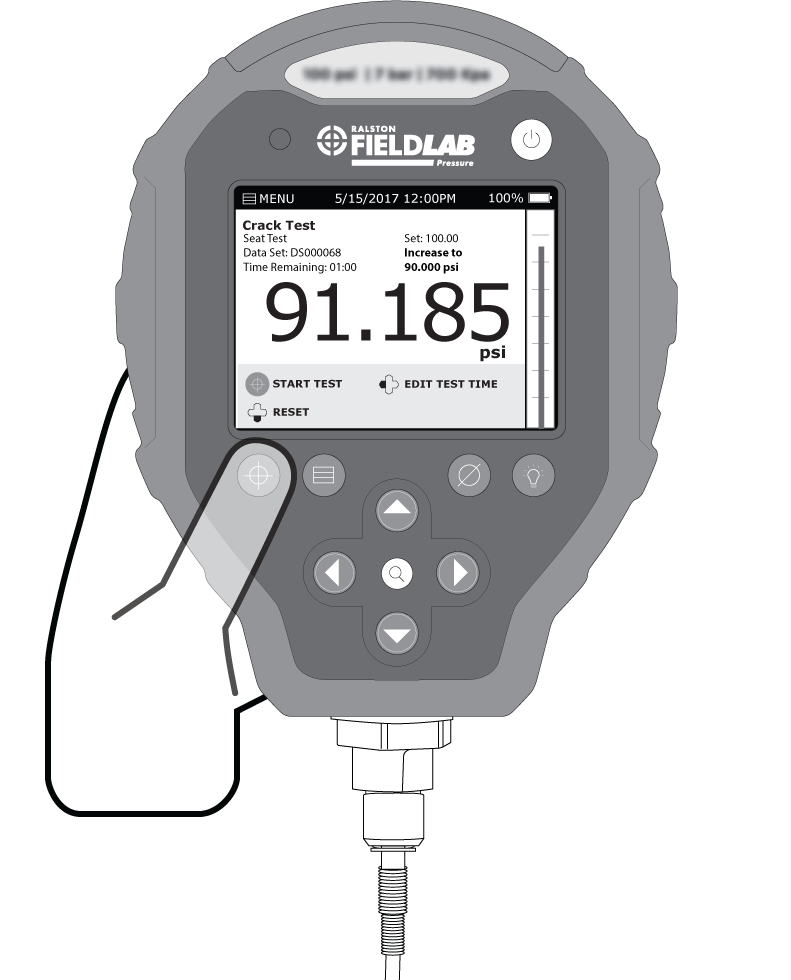
(Optional) If a Seat Tightness Test is included in this Test Mode, it will start immediately after the crack tests are completed. Increase the pressure to the indicated amount on the screen and press "Start Test".
The gauge will record the pressure applied to the valve for the amount of time that was set up when the PSV/PRV Test was created in FieldLab Desktop.
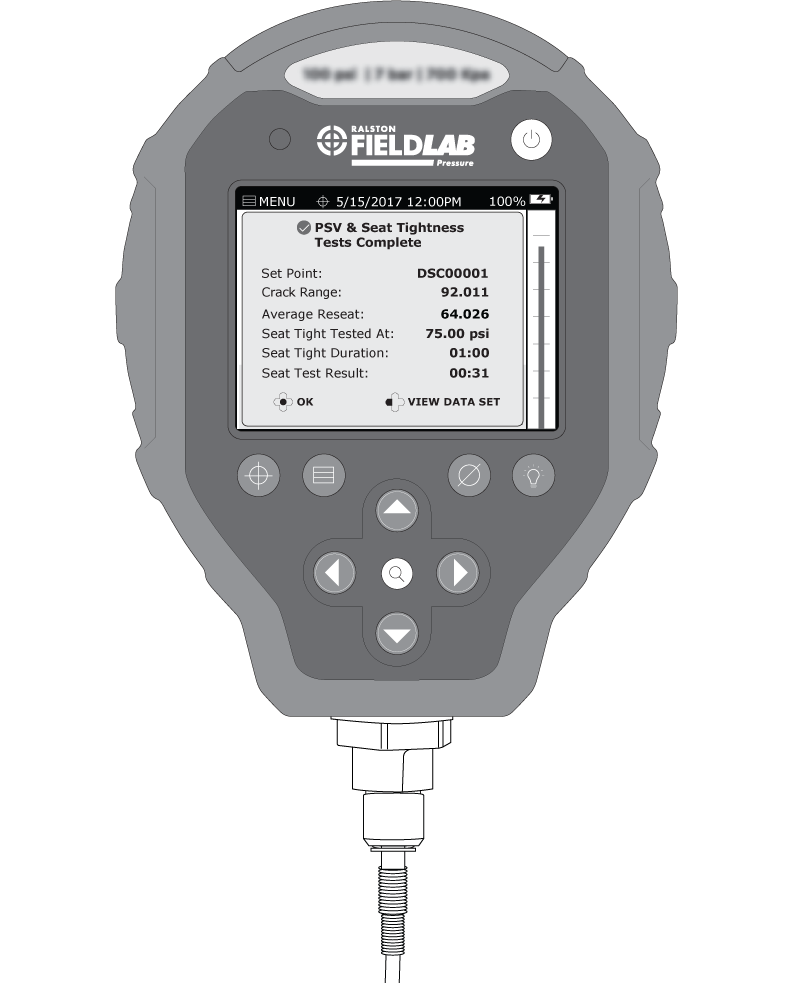
After the Seat Tightness Test is complete, you will be able to input if the seat test had passed or failed.

After the test is complete, you can review the test results. From here you can VIEW DATA SET to see the full details of your test data, or press OK to return to the main pressure screen.
Once you've completed a test, you can import the Data Sets (test results) to FieldLab Desktop. Instructions for doing so are here: Import Data Sets from FieldLab Pressure to FieldLab Desktop.
Once Data Sets have been imported to FieldLab Desktop, you can export them in .csv format. Instructions for doing so are here: Export Data Sets from FieldLab Desktop.
Related Articles
Create a custom Pressure Safety Valve / Pressure Relief Valve Test for a FieldLab
Create a new valve test and add it to a FieldLab Pressure Calibrator to perform tests on pressure safety and pressure relief valves. This feature requires: FieldLab Desktop App version 1.24.0 or later installed on your PC. You can update from within ...Create and Edit a Valve Test for your FieldLab Digital Pressure Calibrator: Quick Overview
This article provides a quick overview. For more detailed, step-by-step instructions, see: Create a custom Pressure Safety Valve / Pressure Relief Valve Test for a FieldLab This features requires FieldLab Desktop 1.24.0 or later. You can update to ...Calibrate the pressure sensor on a Field Gauge, Process Meter, and FieldLab with FieldLab Desktop.
This article applies to calibrating Ralston Field Gauge LC10, LC20, Process Meter LC30, and FieldLab Pressure Calibrator, all models. Things you will need: A PC running Windows 10 or newer. FieldLab Desktop software version 1.40.4 or later installed ...Run a Calibration Test from your computer
Calibration Tests can be run right from your computer with Benchtop Calibration. Minimum Requirements: A Ralston FieldLab pressure device with provided USB cable to use as your reference. A Windows computer with FieldLab Desktop software installed ...Log pressure and/or temperature data to your computer with FieldLab Desktop
This article applies to the following products: Field Gauge LC10, all models Field Gauge LC20, all models Process Meter LC30, all models FieldLab Digital Pressure Calibrator, all models. Things you will need: A PC running Windows. FieldLab Desktop ...
Recent Articles
Use a FieldLab to run a valve test with manual marking of crack and reseat
Use this article if you selected "Manual Marking of Crack and Reseat" when you created your valve test in FieldLab Desktop. The FieldLab interface is slightly different if you selected "Auto Detection of Crack and Reseat". To learn how to perform a ...How to obtain a Return Material Authorization (RMA) to return a product to Ralston Instruments
If you have an issue with a Ralston Instruments product we would recommend that you go to our Knowledgebase. If you have done this and still have an issue please go to our Website at www.ralstoninst.com and browse to Support. Under Support you will ...Turn Bluetooth radio on or off on a Field Gauge LC20 or Process Meter LC30
This article applies to all Field Gauge LC20 and Process Meter LC30 models equipped with a Bluetooth radio. To determine if your gauge is Bluetooth enabled: Check the last two characters in the model number printed on the gauge. If they are "B1", the ...Operation Instructions 10,000 psi Hand Pump (Model XTHP)
Add Fluid 1. Remove the vent plug 2. Add fluid to the Fluid Chamber Acceptable fluids: Ralston Calibration Oil, mineral oil, transmission fluid, water, or alcohol. Add around 2 inches of fluid, or enough fluid to keep the bottom of the fluid ...Operation Instructions 5000 psi Hand Pump (Model QTHP)
Add Fluid 1. Remove the Vent Plug at the top of the Fluid Chamber 2. Add fluid to the Fluid Chamber Acceptable fluids: Ralston Calibration Oil, mineral oil, transmission fluid, water, or alcohol. Remove the vent plug and add around 2 inches of fluid, ...