What you will need:
- A Ralston FieldLab Digital Pressure Calibrator with:
- A max pressure that will accommodate your required pressure range.
- FieldLab Firmware 1.130 or later installed.
- A Snapshot Logging Test added to your FieldLab. If you haven't done this yet, here are some articles to help:
- Create a Snapshot Logging test.
- Add Test Modes to a FieldLab.
- Create a Snapshot Logging test.
- Pressure hose with the proper fittings to connect the FieldLab to the unit you want to log pressure from.
Connect hose and proper fittings to the FieldLab.
Make the connections that will enable you to establish an airtight seal between the object(s) being tested and the FieldLab.
Power on the FieldLab
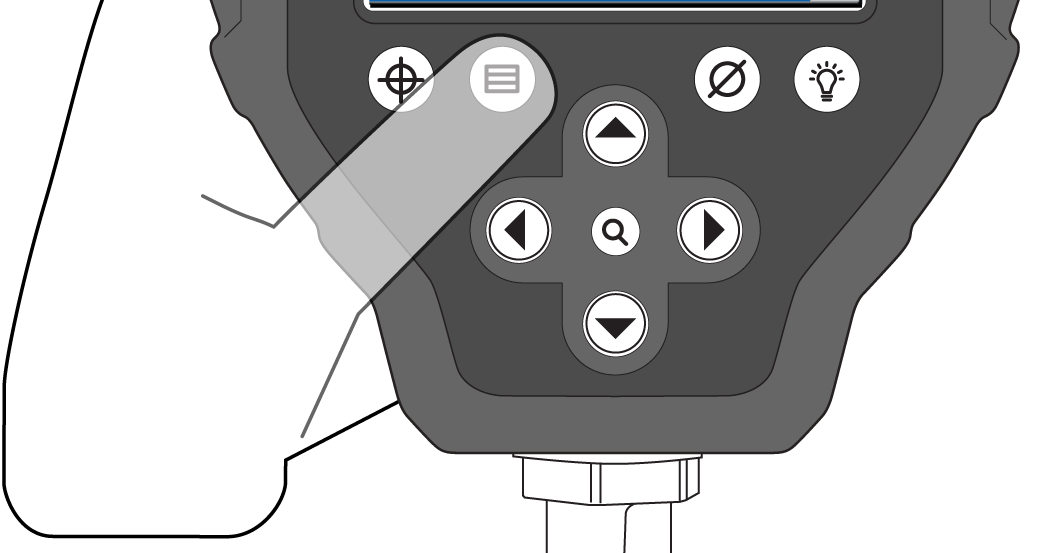
Select the Menu Button
Scroll to Test Modes and press the Right Arrow Button
When you access the Test Modes sub-menu you can view a list of every test that has been added to the FieldLab.

Scroll to the Snapshot Logging test you wish to run by using the Up/Down Arrow Buttons.
Activate the test by pressing the Center Button with the magnifying glass printed on it.
Connect the fitting at the end of your pressure hose to the object you want to log pressure from.
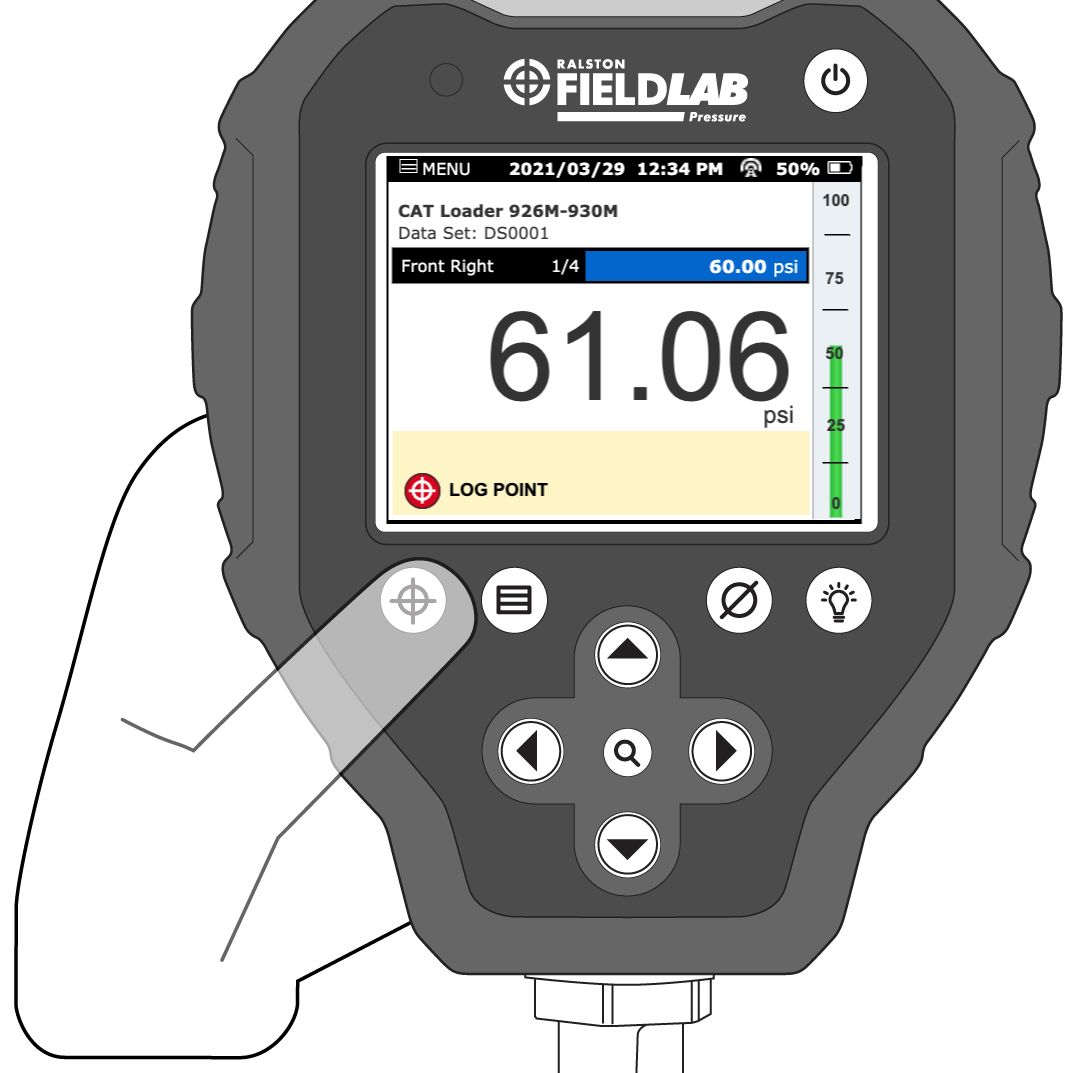
Select the Log Button to log the pressure.
Look at the pressure reading on the FieldLab screen. If you are satisfied that it is displaying the true pressure, select the Log Button.
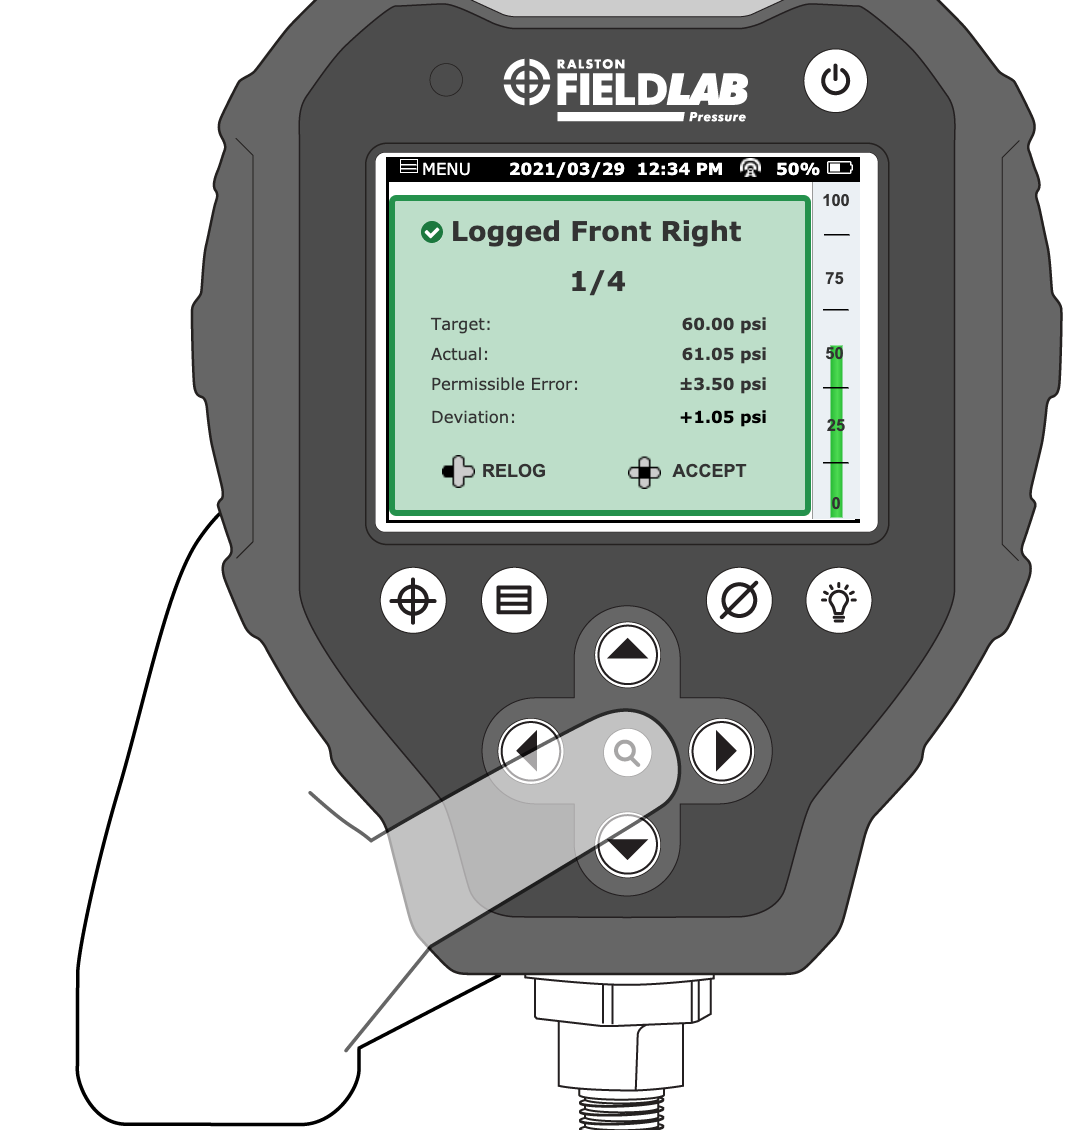
Optional: Relog Point
If for whatever reason (bad seal, you selected the Log Button prematurely, etc.), you need to relog the point , select the Left Arrow Button.

Select Accept to save the point and move on to the next one.
Repeat steps 7 - 10 until you have logged all the required points in your test.
Finish Test:
SPECIFIC NUMBER OF POINTS: If the test you are running contains a pre-specified number of points, the FieldLab will automatically know when you have logged the last point and present you with a "Test Complete" screen.

UNLIMITED POINTS: If the test you are running was defined with an unlimited number of points, select STOP TEST by pressing the Down Arrow button once your test is complete.

Next Steps
Import Data Sets from FieldLab Pressure
View Imported Data Sets on FieldLab Desktop
Export Data Sets from FieldLab Desktop