Note: If you already have an assembled enclosure kit and want instructions for mounting it, you can find them here: Mount FieldLab Enclosure Kit.
Tools you will need:
- Wrench
- Allen head wrench
- Phillips screwdriver
- Lag screws (If mounting to a wall)
- NPT or tube fitting bulkhead adapter
- Lock (If you wish to secure the enclosure)
- Ralston Quick-test Adapters

Important Safety Notices:
- Warning: Do not connect or disconnect from power connection in hazardous locations.
- Warning: Do not connect or disconnect from USB in hazardous locations.
Add the Test Mode you wish to use to your FieldLab.
If you haven't already, create the Test Mode you wish run and add it to the FieldLab before you install it in the Outdoor Enclosure Kit. Everything you need to know about Test Modes, including creating, customizing, and adding to the FieldLab can be found here.
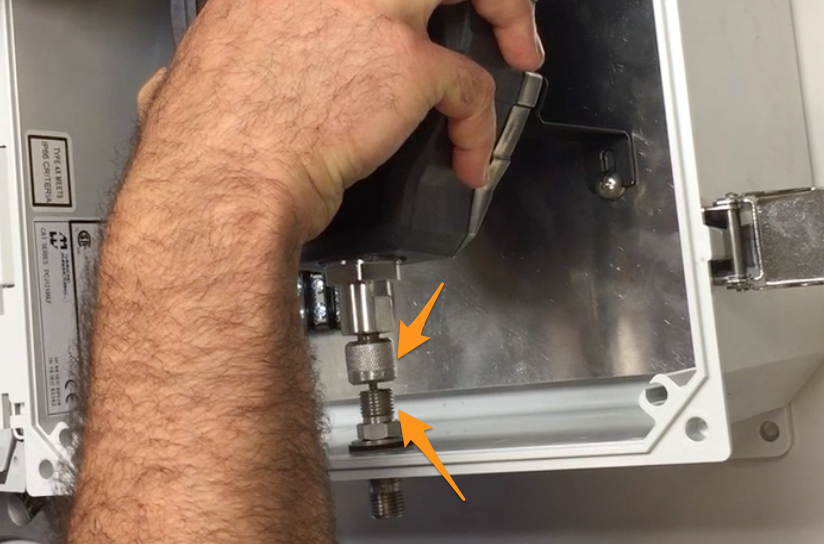
Install bulkhead fitting at the base of the enclosure.
Push the provided NPT or tube fitting bulkhead adapter through the pre-drilled hole at the base of the enclosure and secure it with the washer and bolt. Thread the bolt hand-tight.

Attach FieldLab adapter to the back of the FieldLab.
Secure the FieldLab enclosure adapter to the back of the FieldLab with three allen-head screws (provided).

Connect wiring to enclosure terminal
Use the wiring diagram in the enclosure as a guide to attach wires to the correct terminals. Secure wires to terminals with a Phillips head screwdriver.


Connect the power cord to the back of the FieldLab
Push the power cord connector pin into the power outlet on the back of the FieldLab. Screw the nut finger tight.
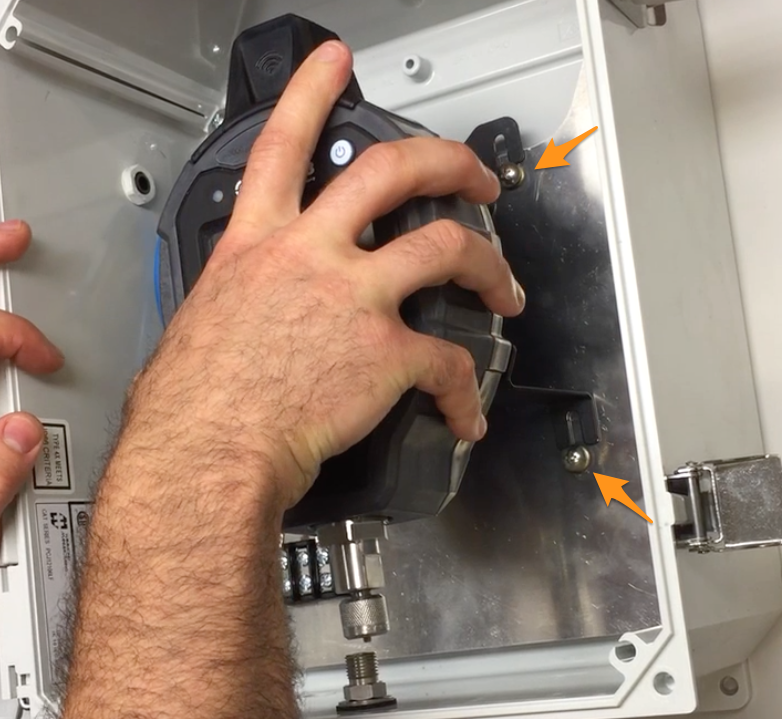
Mount the FieldLab inside the enclosure
Slide the FieldLab and attached adapter bracket over back-side of the four screws on the back-inside wall of the enclosure. You may have to loosen the screws to make space for the bracket to slide behind them.
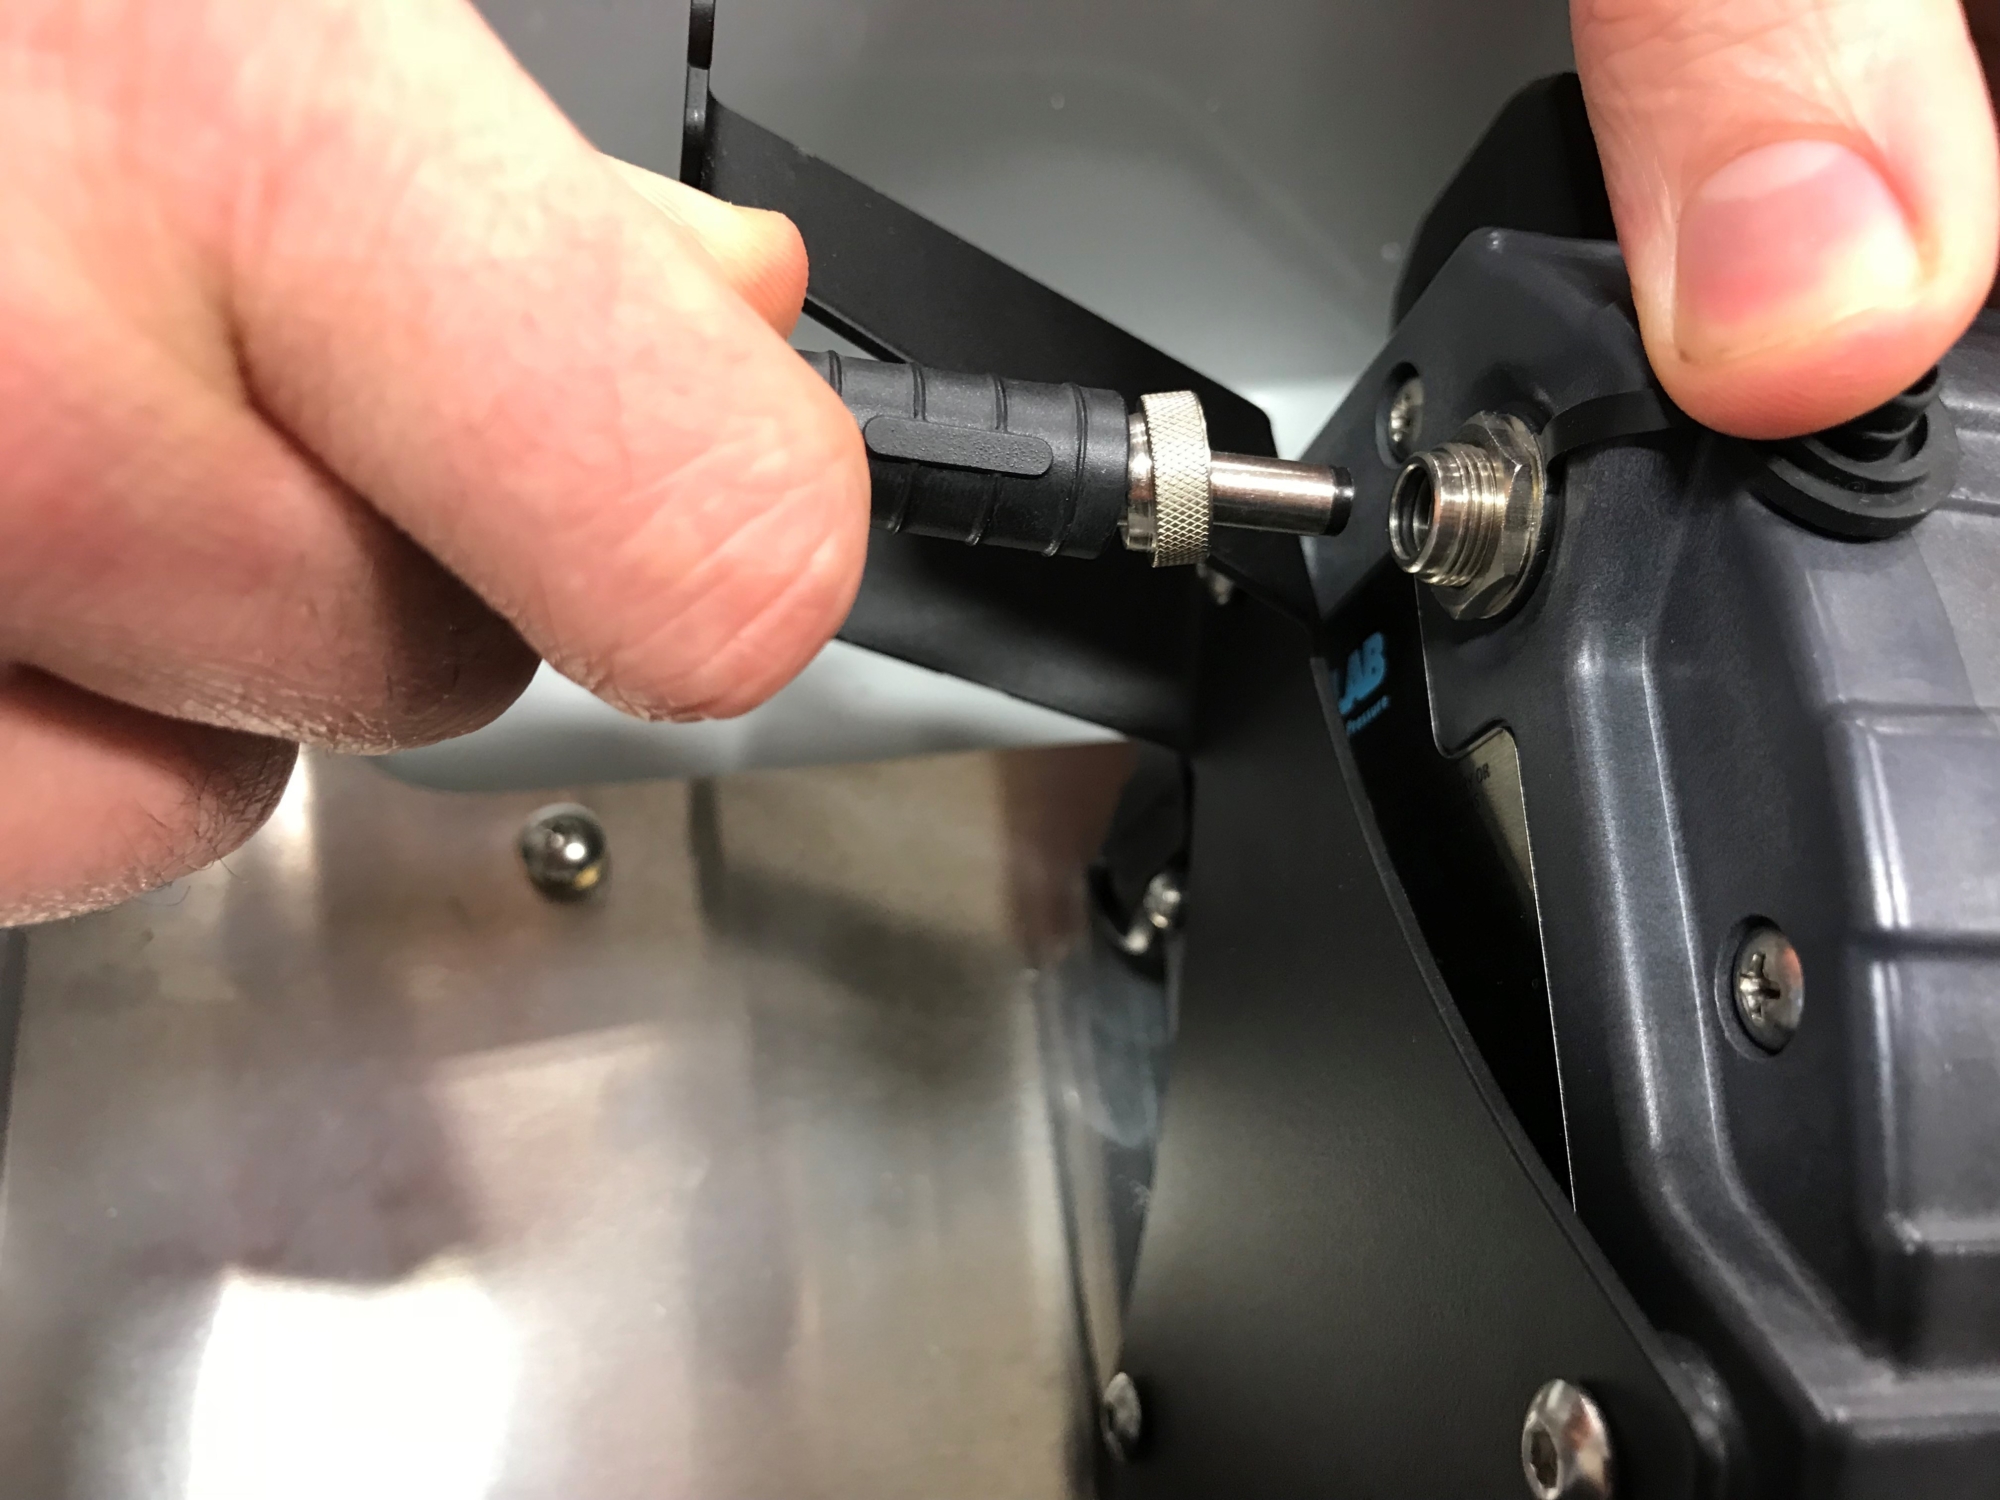
Connect FieldLab to bulkhead fitting.
Align NPT or tube bulkhead fitting in the center with the Ralston Quick-test™ adapter on the FieldLab. Hand tighten.
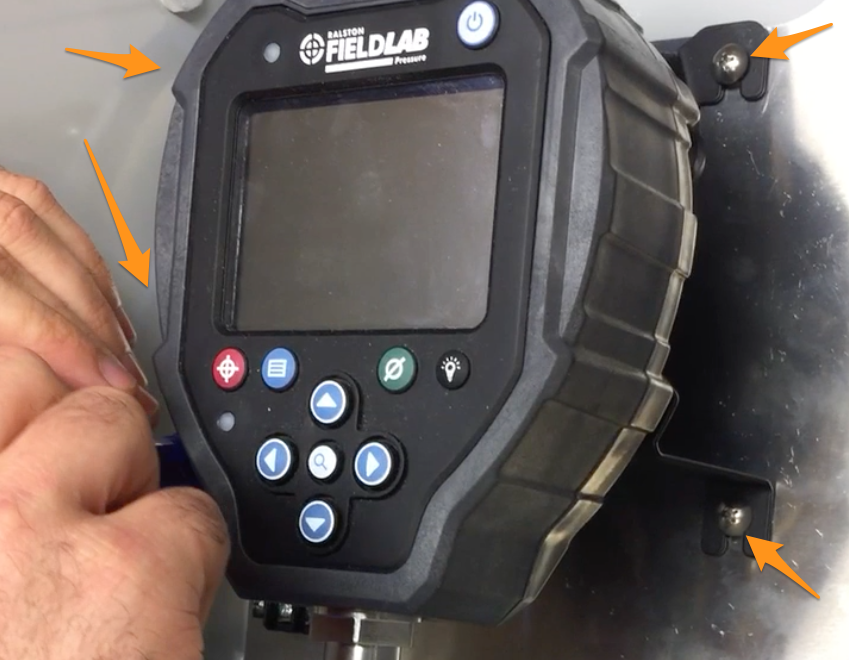
Tighten adapter bracket screws
Tighten all four adapter bracket screws on with a Phillips head screwdriver to secure the FieldLab to the back wall of the enclosure.
Connect the ground wire to the bulkhead fitting
Thread the ground wire through bulkhead fitting in bottom right hole of the FieldLab Outdoor Enclosure.
- Attach nut on inside to gasket on outside of FieldLab Outdoor Enclosure.
- Screw nut finger-tight.

Secure ground wire to inside of enclosure
Connect the end of the ground wire to the back of the enclosure with the provided screw at the bottom right. Tighten screw with a Phillips head screwdriver.

Upon completion of the above steps, your FieldLab Enclosure Kit should be fully assembled and ready for mounting.
For mounting instructions, see: Mount FieldLab Enclosure Kit.
